Data Migration - Imports
on 01-20-2025 12:00 AM by SnapApp by BlueVector AI
406
Data Migration: Import Guide
Data importing is the essential process of moving structured information from external sources (CSV or JSON files—into the SnapApp platform). Instead of manual data entry, the Data Migration tool allows you to populate your application objects at scale.
Table of Contents
- 1. Understanding Import Operations
- 2. Pre-Import Checklist (Data Cleaning)
- File Structure & Architecture
- Data Formatting & Scrubbing
- JSON Preparation
- 3. Reference Field Mapping
- How Reference Fields Work
- Rules for Reference Imports
- 4. How to Create a New Import
- Configuration Settings
- 5. Monitoring & Completion
- 6. Troubleshooting
1. Understanding Import Operations
Before starting, you must decide how your data should interact with the SnapApp database. There are three primary operations:
- New: Use this to create an entirely new object and its fields. SnapApp builds the object structure based on your file headers and populates it with records simultaneously. This type is ideal for initial data setup if you already have your data in the desired schema.
- Append: Use this to add new rows of data to an existing object. This does not change existing records; it only grows the list. Note: If an object exists in SnapApp but contains no records, use Append rather than New.
- Update: Use this to change specific values within existing records. It uses a matching Key Column (like an ID) to find the correct record and overwrite data. This requires accurate key field mapping.
2. Pre-Import Checklist (Data Cleaning)
To ensure a successful 100% completion rate, your data file must be “SnapApp-ready.” Follow these formatting rules to prevent errors.
File Structure & Architecture
SnapApp currently supports CSV and JSON formats.
- One File Per Object: Separate each table/entity into its own CSV file.
- Unique IDs: Every file must contain a unique ID column for every record.
- While these don’t need to be in UUID format initially, each value must be unique.
- SnapApp will automatically convert these to the correct UUID format upon import.
- Load Order (Dependencies): If Object A refers to Object B, you must import Object B (the Parent) first.
- Once the Parent is imported, update the Foreign Key (FK) values in your child spreadsheet to match the newly generated SnapApp UUIDs.
- Size Limits: For files larger than 2GB, break them into smaller “chunks” to prevent timeout errors.
Data Formatting & Scrubbing
- Headers: The first row must contain lowercase headers using underscores (e.g.,
department_name). These headers represent your field names. - Reserved Fields: Map source headers to SnapApp’s reserved names where applicable:
id,created_by,owner_id,active,sequence. - Dates: Must be in
YYYY-MM-DDformat. - Currency: Use raw decimals only (e.g.,
1250.50). Remove symbols like$,€, or commas. - Data Scrubbing:
- Eliminate text like “Null” or “None.”
- Ensure no “Invalid HTML” (broken tags) exists inside text fields.
- Identify and remove redundant records to maintain data integrity.
- Verify that header names are in line with the field names of the object you are appending or updating.
- Convert data elements in your source file to the correct data types (e.g., text, numeric, date) as required by SnapApp’s fields.
- Ensure all required fields are complete.
JSON Preparation
- Ensure data is well-formed with proper use of curly braces
{}and square brackets[]. - All keys must be strings enclosed in double quotes.
- Maintain consistent data types for each key across all records.
3. Reference Field Mapping
Reference Fields (Foreign Keys) connect different objects to create a relational database. Mapping these correctly is critical for data integrity.
How Reference Fields Work
When importing into a Reference Field, SnapApp looks for a matching value in the Parent Object to establish a link.
- The Match: By default, SnapApp looks for the
id(UUID) of the related record. - The Conversion: If using a unique identifier from a legacy system (e.g.,
account_number), specify that column in the Key Columns configuration so SnapApp can resolve the relationship.
Rules for Reference Imports
- Load Order is King: Always import the Parent object (the source) before the Child object (the one referring to it).
- Example: Import ‘Departments’ before ‘Employees’.
- Strict Matching: Ensure the value in your CSV matches the unique identifier in the target object exactly. Casing and trailing spaces will cause failures.
- Handle UUIDs: Use the
idfield when migrating between SnapApp environments. For external migrations, ensure external IDs are mapped to a field designated as a “Key.”
4. How to Create a New Import
- Navigate to User Profile > Settings.
- In the left sidebar, go to Data > Data Migrations.
- Click Add New.

Configuration Settings
- Operation: Select Import.
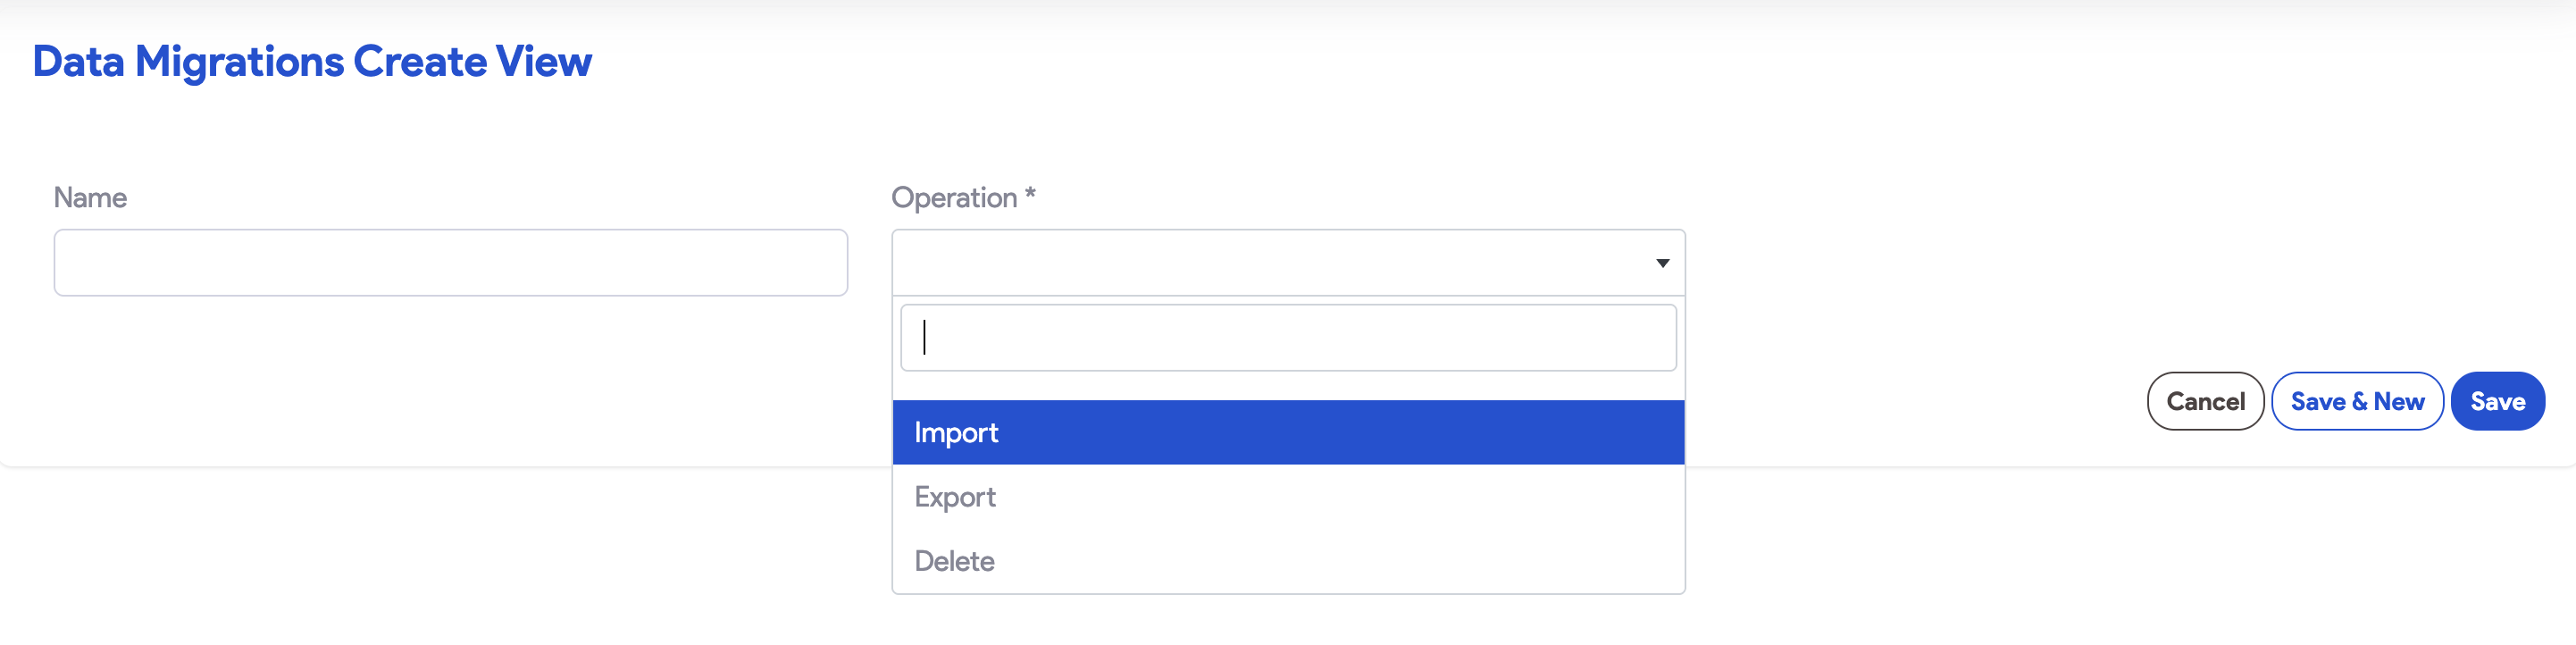
- Name: Provide a descriptive name for future reference in logs.
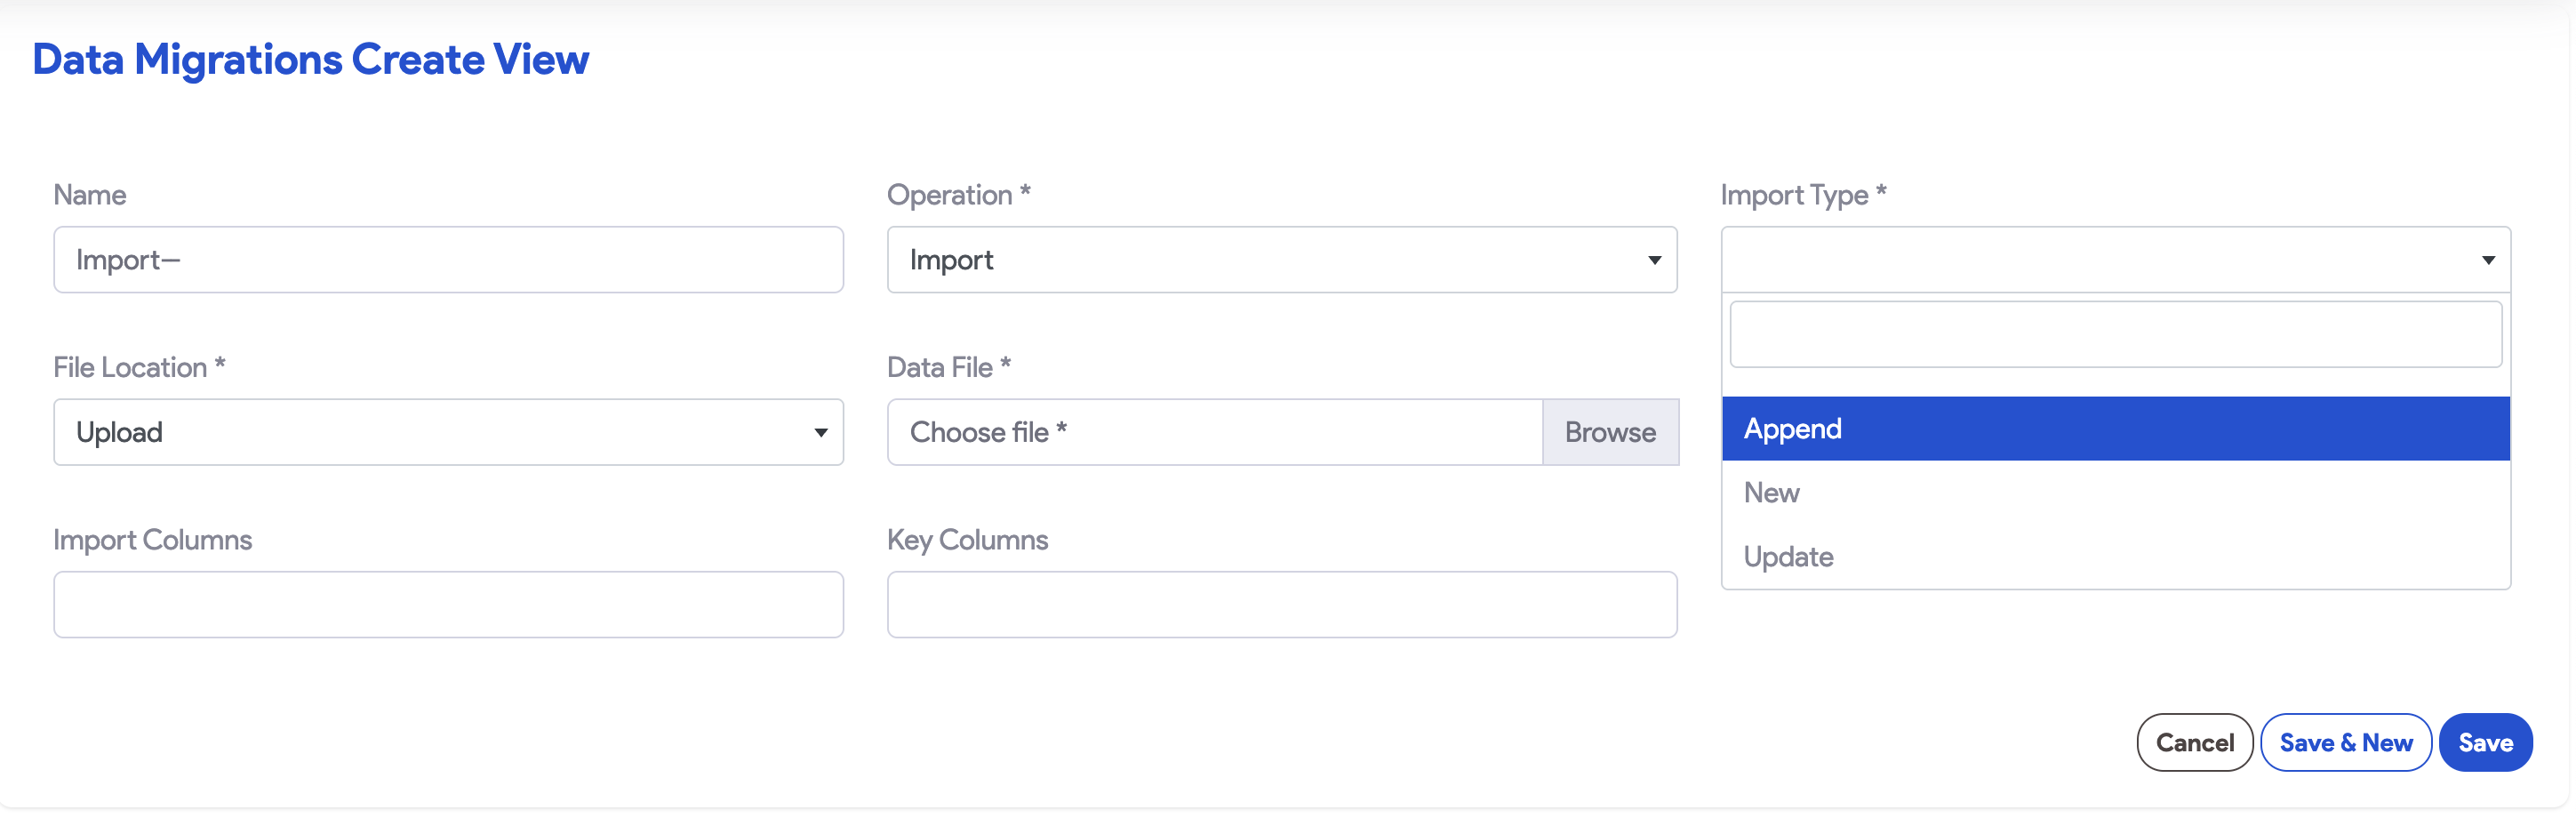
- Import Type: Select New, Append, or Update.
- Object Label / ID:
- For New imports: Enter the singular name of the target object (e.g.,
Department). - For Append/Update: Select the target object from the dropdown.
- File Location:
- Upload: Select your
.csvor.jsonfile. - URL: Enter a GS util URL or a public bucket link.
- Trigger Evaluations: Select Yes if you want formulas, expressions, or workflows to trigger as data is imported.
- Import Columns: (Optional) List a subset of columns to import as a comma-separated list.
- Key Columns: List columns serving as Unique IDs or Foreign Keys. SnapApp will automatically convert these into UUIDs. On Update, this field identifies which records to overwrite.
5. Monitoring & Completion
Once you save your migration, track its progress on the Data Migration page.
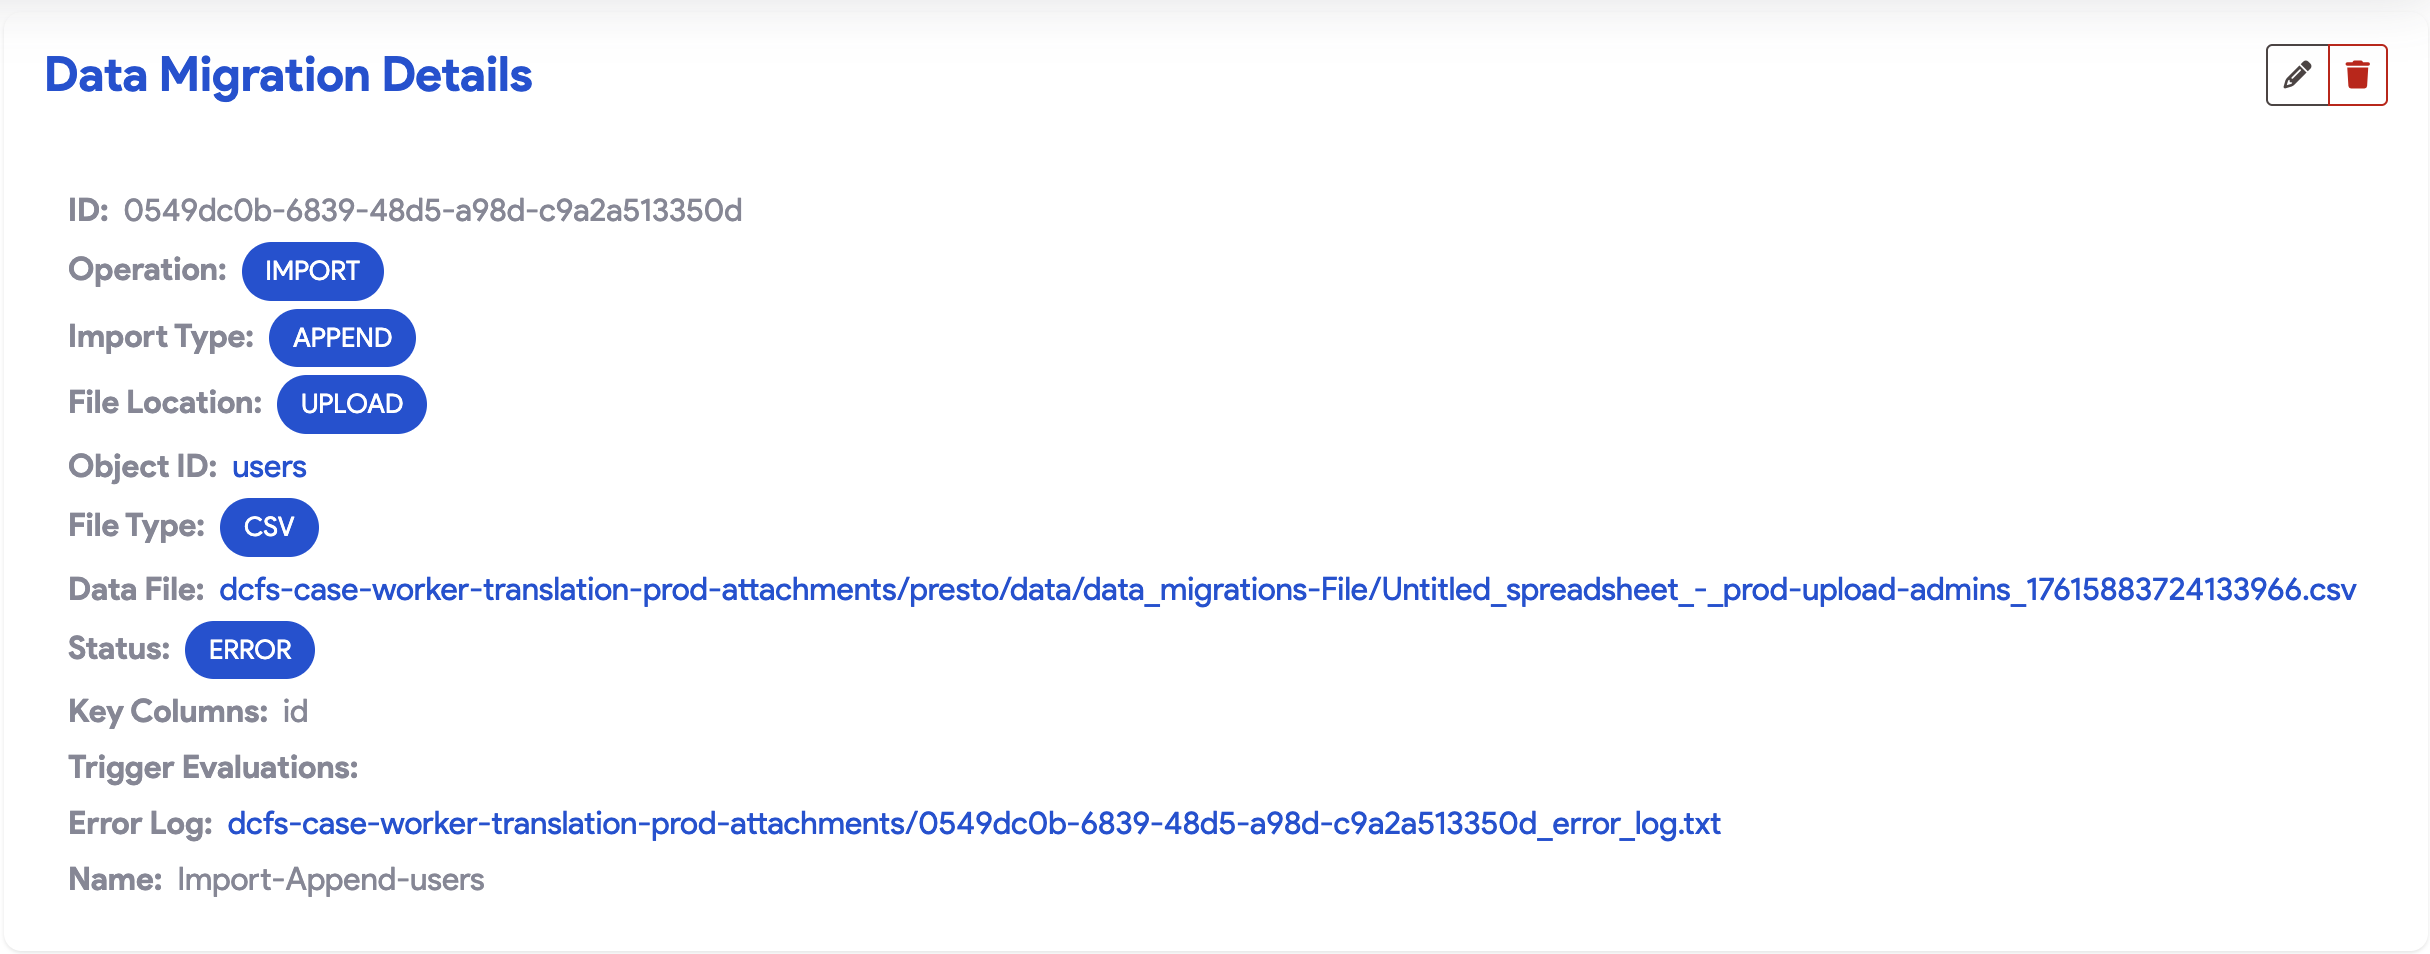
- Success: A progress bar at 100% indicates completion. You can verify records by previewing the object.

- Failure: If the status displays Error, click the Error Log file link view the migration log. This provides a detailed breakdown of the failure.
6. Troubleshooting
If your import fails or stalls, review these common solutions:
- Check the Logs: Review the SnapApp Migration Log first. If no log is produced, check GCP Console Logging for infrastructure errors.
- Verify Schema: Ensure your CSV column names exactly match the target object’s fields.
- Data Compatibility: Check that numeric fields contain only numbers and boolean fields use valid values.
- Constraint Violations: Ensure your data doesn’t violate length restrictions or “Required” field constraints.
- Scale Down: If a large dataset fails, try importing a smaller subset (e.g., 10 rows) to validate the configuration.
For support, email us at snapapp@bluevector.ai