Time Based Workflow
on 01-30-2026 12:00 AM by SnapApp by BlueVector AI
1678
Workflow Trigger: Time Based
A Time Based Workflow is a scheduled automation process that executes at specific intervals or at a predetermined time, regardless of user interaction or database changes. This is the ideal trigger for recurring tasks such as sending weekly reports, clearing temporary logs, or checking for overdue deadlines.
Table of Contents
- Configuring the Time Based Trigger
- 1. Create the Workflow
- 2. Set the Object and Type
- 3. Define the Schedule
- Building the Logic
- Monitoring and Management
- Support
Configuring the Time Based Trigger
Unlike database-driven triggers, Time Based workflows rely on a “Chron” or interval setting to determine when the logic runs.
1. Create the Workflow
- Navigate to Automation > Workflows in the settings sidebar.
- Click the + Add New button in the top-right header of the list.
- Provide a unique Name and a detailed Description for the scheduled task.
2. Set the Object and Type
- Object: Select the database table that this workflow will evaluate during its scheduled run.
- Type: Select Time Based from the dropdown menu.
3. Define the Schedule
By setting the Trigger Type to “Single”, your Time Based Workflow will only fire once. You can select “Repeating” to define a recurring schedule for the workflow.
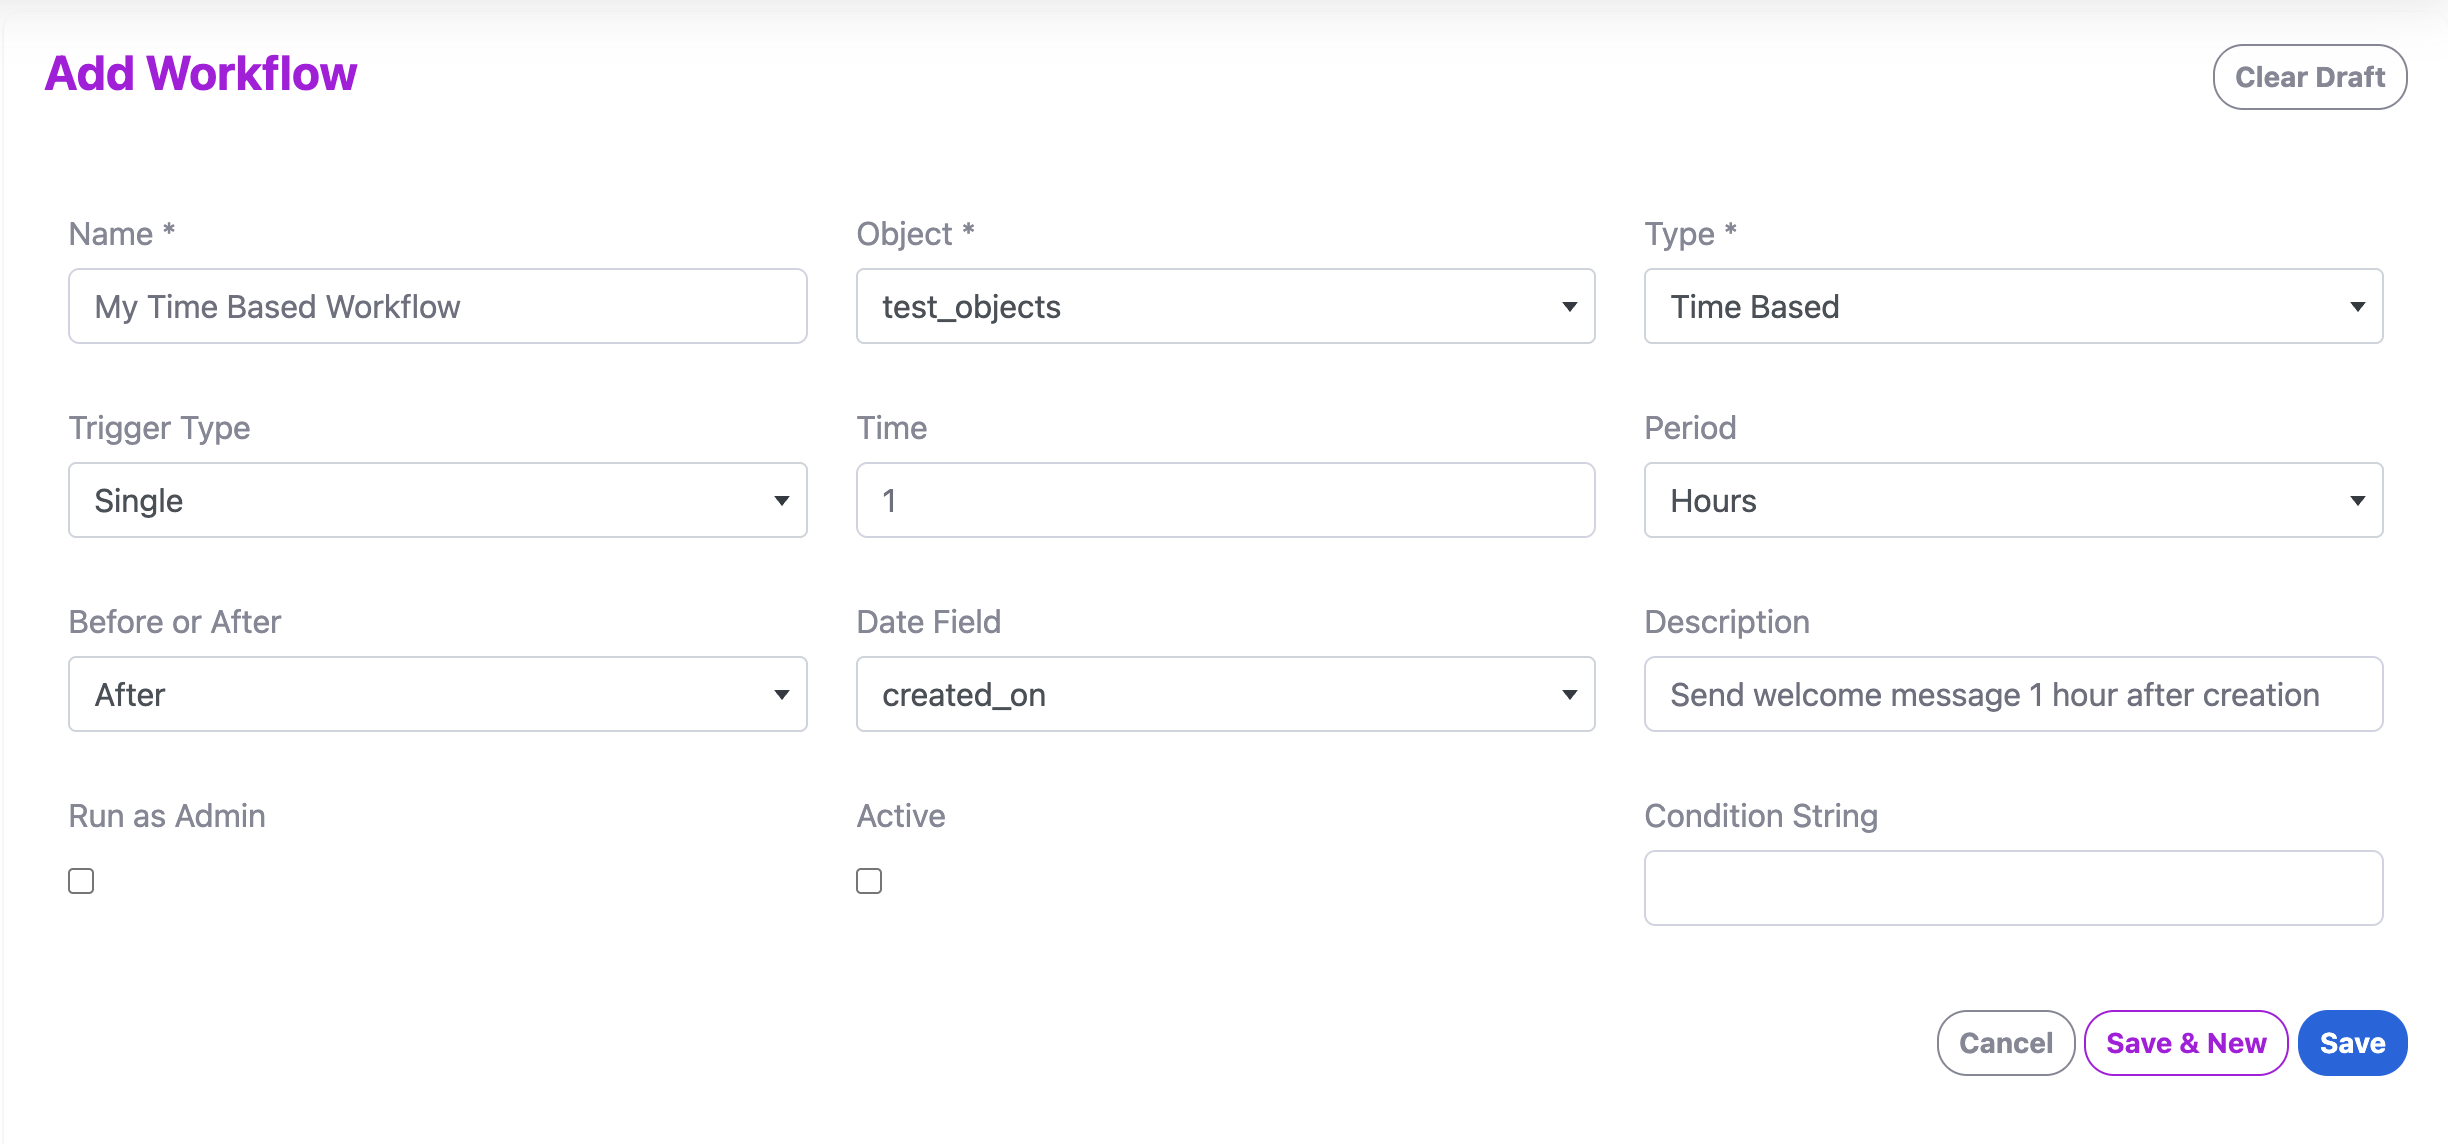
Single Iteration
In a Single trigger workflow, the automation is anchored to a specific date field on your records. This is ideal for “offset” automations, like sending a follow-up 24 hours after a lead is created.
- Time: The numerical value of the offset (e.g., 1 or 30).
- Period: The unit of time for the offset (e.g., Hours, Days, or Months).
- Before or After: Determines if the workflow fires leading up to or following the anchor date.
- Date Field: The specific DateTime field on the object used as the anchor (e.g.,
created_on).
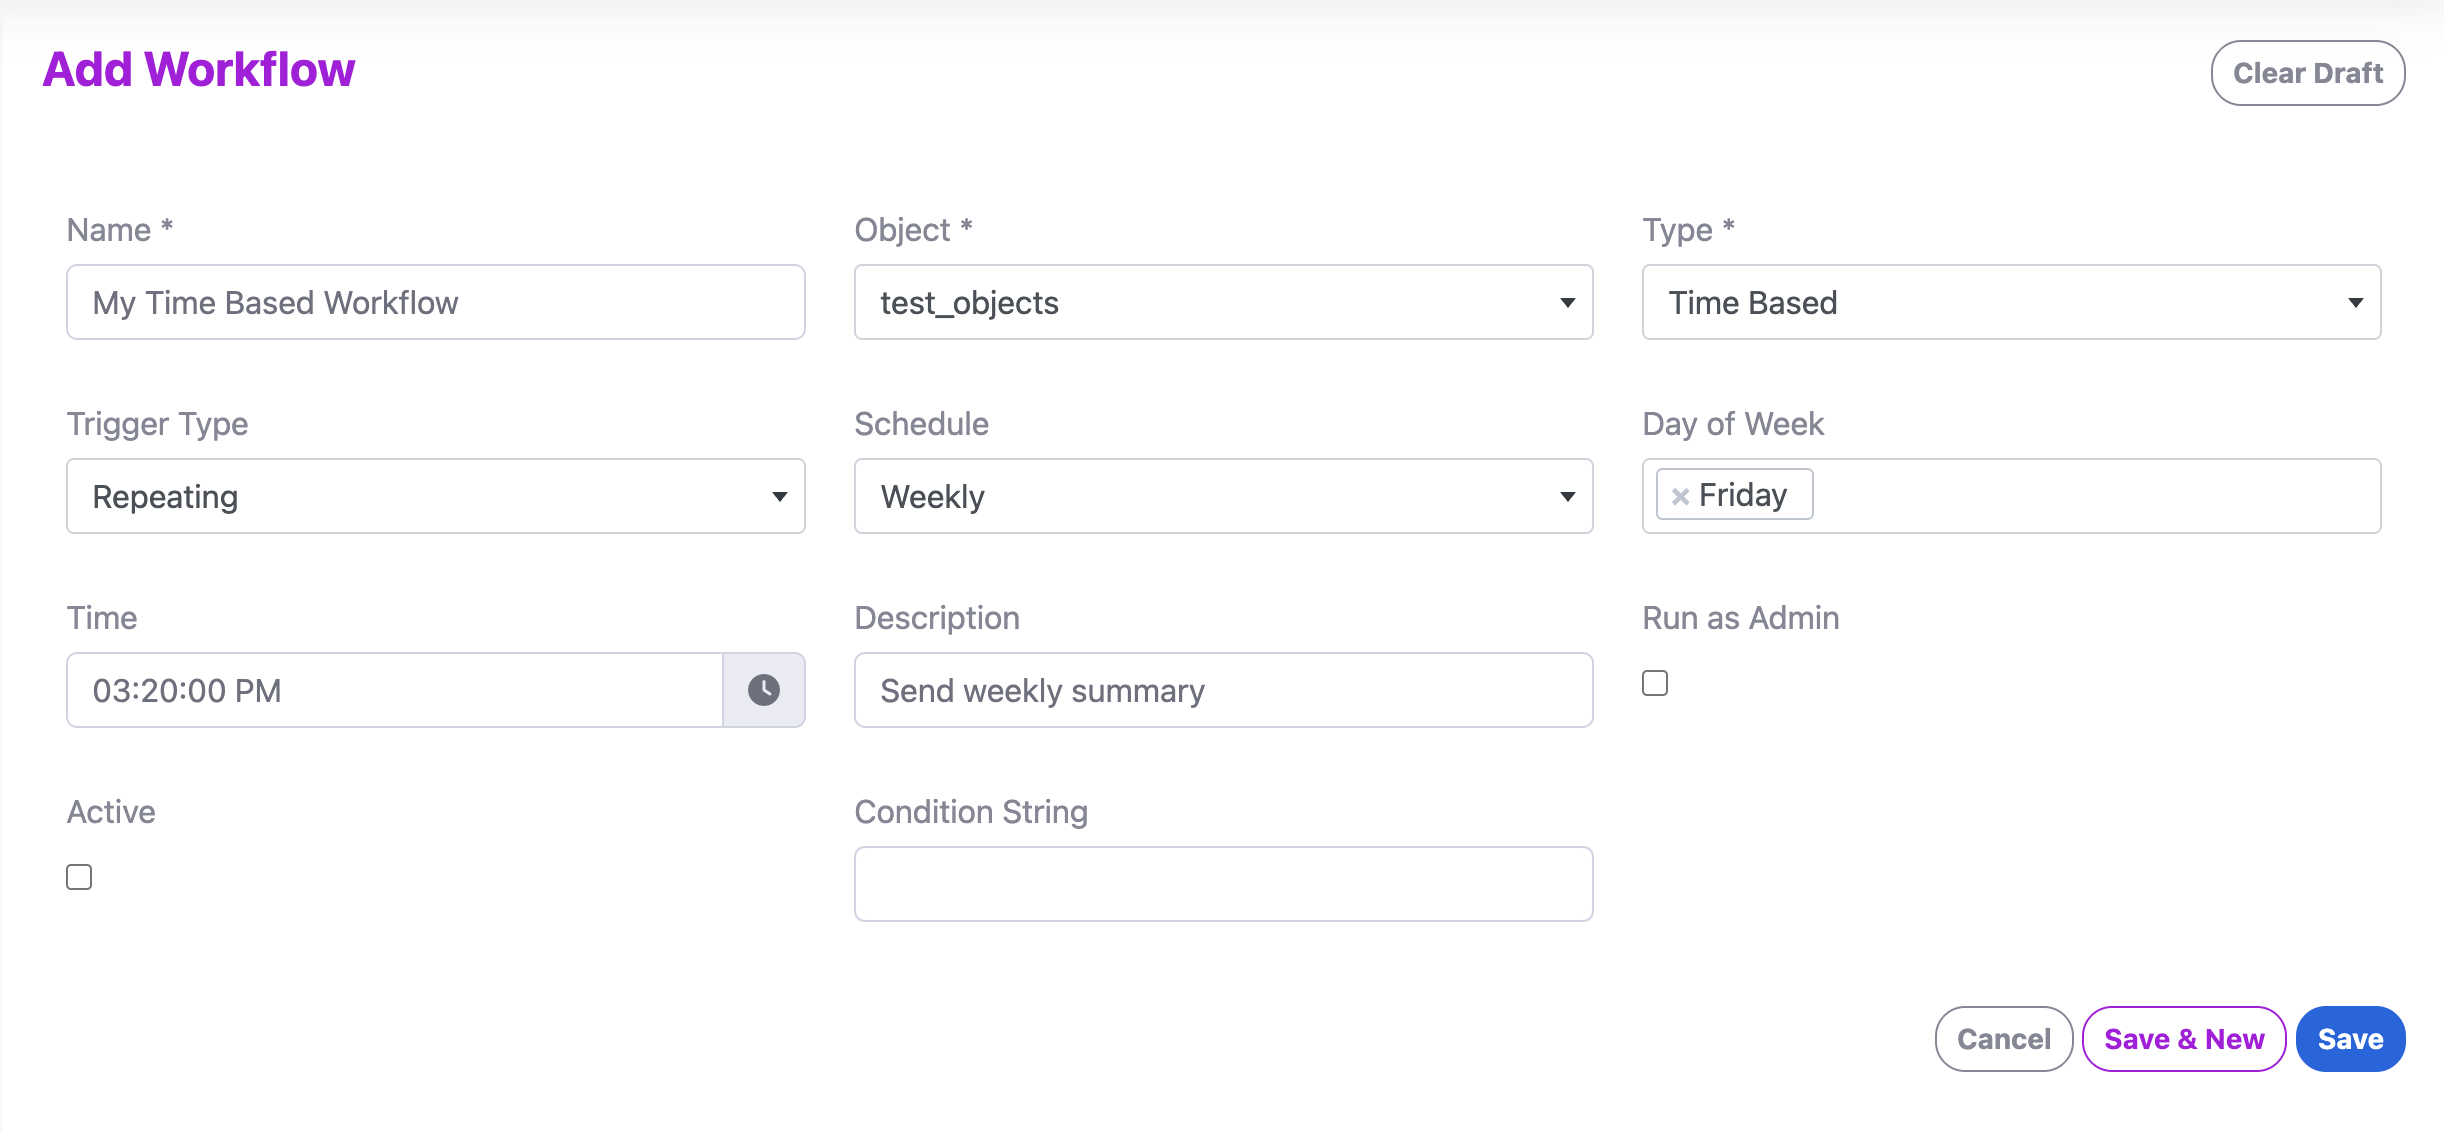
Recurring Schedule
In a Recurring trigger workflow, the automation runs on a consistent, recurring basis regardless of individual record dates. This is perfect for batch processing or periodic clean-up.
- Schedule: The frequency of the run (e.g., Daily, Weekly, Monthly).
- Day of Week: (Appears for Weekly) Select which day(s) the workflow should execute.
- Day of Month: (Appears for Monthly) Select which day the workflow should execute.
- Time: The specific time of day the workflow starts (e.g., 03:20:00 PM).
Building the Logic
Once the schedule is set, you can define the operations the workflow performs during its run.
- Diagram View: Use the Diagram View to build the execution path.
- ForEach Component: Time Based workflows often use a ForEach loop to scan the entire target object and apply logic to every record that meets a certain condition.
- Action Blocks: Trigger notifications, data migrations, or field updates based on the time-sensitive logic you’ve defined.
Monitoring and Management
- Type Visibility: The Type column in the Workflows list will display TIME BASED along with the defined schedule details.
- Management Icons:
- Wrench Icon: Enter the builder to update child actions or loop configurations.
- Pencil Icon: Modify the parent schedule, such as changing a “Daily” run to “Weekly”.
- Events & Logs: Check the Events list in the workflow details to confirm the scheduler fired at the correct time. If a scheduled run fails (e.g., a timeout or a broken expression), the logs will provide the necessary details for troubleshooting during testing.
Support
If you have any questions or need further assistance, please reach out to our support team.