Workflow Actions - Integration
on 02-03-2026 12:00 AM by SnapApp by BlueVector AI
1798
Overview
The Integration Workflow Action allows SnapApp to communicate with external systems or internal services automatically.
Using this action, you can trigger integrations such as sending data, syncing records, or invoking third-party APIs whenever a workflow runs.
This guide walks you through the process step by step, so even first-time users can configure an Integration action confidently.
Table of Contents
- Overview
- Table of Contents
- Step-by-Step Guide to Add an Integration Action
- Step 1: Open Workflow Settings
- Step 2: Navigate to Workflow Actions
- Step 3: Configure the Integration Action
- Step 4: Set Action Order and Status
- What Happens Next?
Step-by-Step Guide to Add an Integration Action
Step 1: Open Workflow Settings
- Look at the top-right corner of the SnapApp interface.
- Click on User Settings.
- From the left navigation menu, expand the options.
- Navigate to:
Automation → Workflows
This section is where all workflow automations are created and managed.
Step 2: Navigate to Workflow Actions
- Open the workflow where you want to add an integration.
- Go to the Actions section within the workflow.
- Click on the
+(Add Action) button.
This opens a new window where you can configure the workflow action.

This screen allows you to add a new action to your workflow.
Step 3: Configure the Integration Action
In the Add Action window, fill in the following fields carefully:
- Name
- Enter a meaningful name for the action.
-
Example:
Send Data to CRM,Trigger Webhook, orSync User Details. -
Type
- Select Integration from the dropdown.
-
This tells SnapApp that this action will connect to another system.
-
Integration
- Choose the required integration from the list.
- This list contains all integrations already configured in your system.
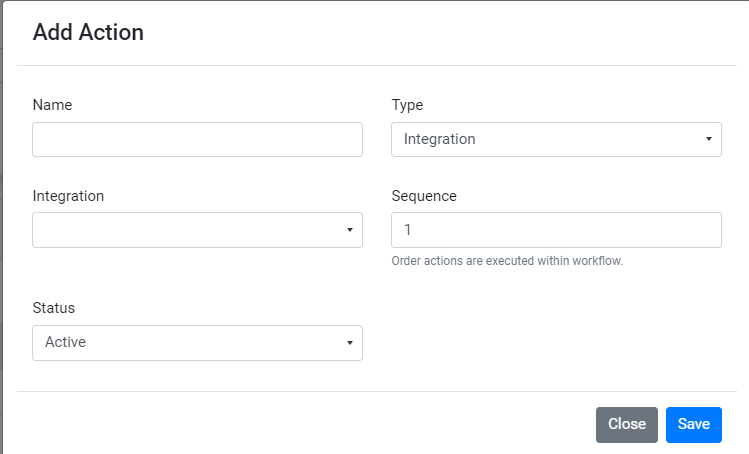
This window shows where you select the Integration type and choose the specific integration.
Step 4: Set Action Order and Status
- Sequence
- Adjust the sequence number if your workflow has multiple actions.
-
Lower numbers run first; higher numbers run later.
-
Status
- Active: The action will execute when the workflow runs.
-
Inactive: The action is saved but will not run.
-
Click Save to finalize the action.
Once saved, the Integration action becomes part of your workflow.
What Happens Next?
- When the workflow is triggered, SnapApp will automatically execute the selected integration.
- This ensures seamless data flow between SnapApp and the connected system without manual intervention.
Thank you for following these steps to configure your SnapApp components effectively.If you have any questions or need further assistance, please don’t hesitate to reach out to our support team. We’re here to help you make the most out of your SnapApp experience.
For support, email us at snapapp@bluevector.ai