Sharing Rules
on 01-14-2026 12:00 AM by SnapApp by BlueVector AI
359
Sharing Rules: The Fundamentals
Create and manage sharing rules as described in the following sections:
Table of Contents
- What is a Sharing Rule?
- Different Methods of Creating Sharing Rule
- 1. Configure a Sharing Rule (using original method)
- Edit a Sharing Rule
- 2. Share a record using Share Button
- A. One Record → Single User / One Record → Multiple Users (Using Share Button)
- 3. Share records using Custom Functions and Workflows
- A. Multiple Record → Single User / Multiple Record → Multiple User (Using SnapApp Custom Function)
- I. Create a Custom SnapApp Function :
- Example Function Body Snippet
- II. Create a Workflow and Establishing Sharing Rules
- Delete a Sharing Rule
What is a Sharing Rule?
Sharing rules are used to control the flow of data between users or queues. This can be implemented using a combination of data access roles or can be defined based on record-level rules.
Different Methods of Creating Sharing Rule
1. Configure a Sharing Rule (using original method)
- From Access Control dropdown select Sharing Rules.
- Select + Add New from the Sharing Rules table header.
- Fill in the required information like:
A. Name → Enter the name of the sharing rule.(eg: Share All Users to admin)
B. Object ID→ The UUID of the object whose records are to be shared.
C. Rule Type → Defines how records are selected for sharing.
Available options: - Record – Share all records. (Used always) - Data Access Role – Share records based on a data access role.
D. Rule Type Record (optional) → UUID of the Record.
E. Rule Type Formula (optional) → An expression that returns a list of record IDs to be shared.
F. Share With Type → Specifies who the records will be shared with.
Available options: - User – A single user - Queue – A group of users (Queue)
G. Share With Record → The UUID of the user or queue with whom the records will be shared.
H. Share With Formula (optional) → An expression that returns a list of user or group (Queue) IDs with whom the sharing will be established.
- Click Save to save your configurations.
Edit a Sharing Rule
- From the Sharing Rule list view select the edit pencil on the right hand side of the Sharing Rule you wish to configure.
- Make your edits.
- Click Save to save your configurations.
2. Share a record using Share Button
The Share Record feature allows users to share individual records directly to the user or Queue of Users without creating a sharing rule.
A. One Record → Single User / One Record → Multiple Users (Using Share Button)
- Open the record you want to share in Detail, Create, or Form view.
- Click the Share button available in the record view.
- A Share Record modal opens. This modal is similar to the Transfer Ownership modal.
- Select the user/queue with whom you want to share the record.
- Choose the Access Type:
a. Read – Allows the user to view the record b. Write – Allows the user to edit the record
- Click Share (or Save) to confirm.
- The system creates a new entry in the
[<object’s name>__shares]table. (this is basically create-view of objects__shares object) - The selected user gains access to the record based on the chosen access type.
- Sharing is applied immediately and does not require a sharing rule.
3. Share records using Custom Functions and Workflows
A. Multiple Record → Single User / Multiple Record → Multiple User (Using SnapApp Custom Function)
To establish record sharing using SnapApp Functions, you must create a custom function and then attach it to a workflow of the relevant object.
I. Create a Custom SnapApp Function :
- Go to Automation from the left navigation bar.
- From there, Click on SnapApp Functions. (Learn More about SnapApp Functions here.)
- The SnapApp Function List View opens.
-
Click the + Add New button located in the top-right corner.
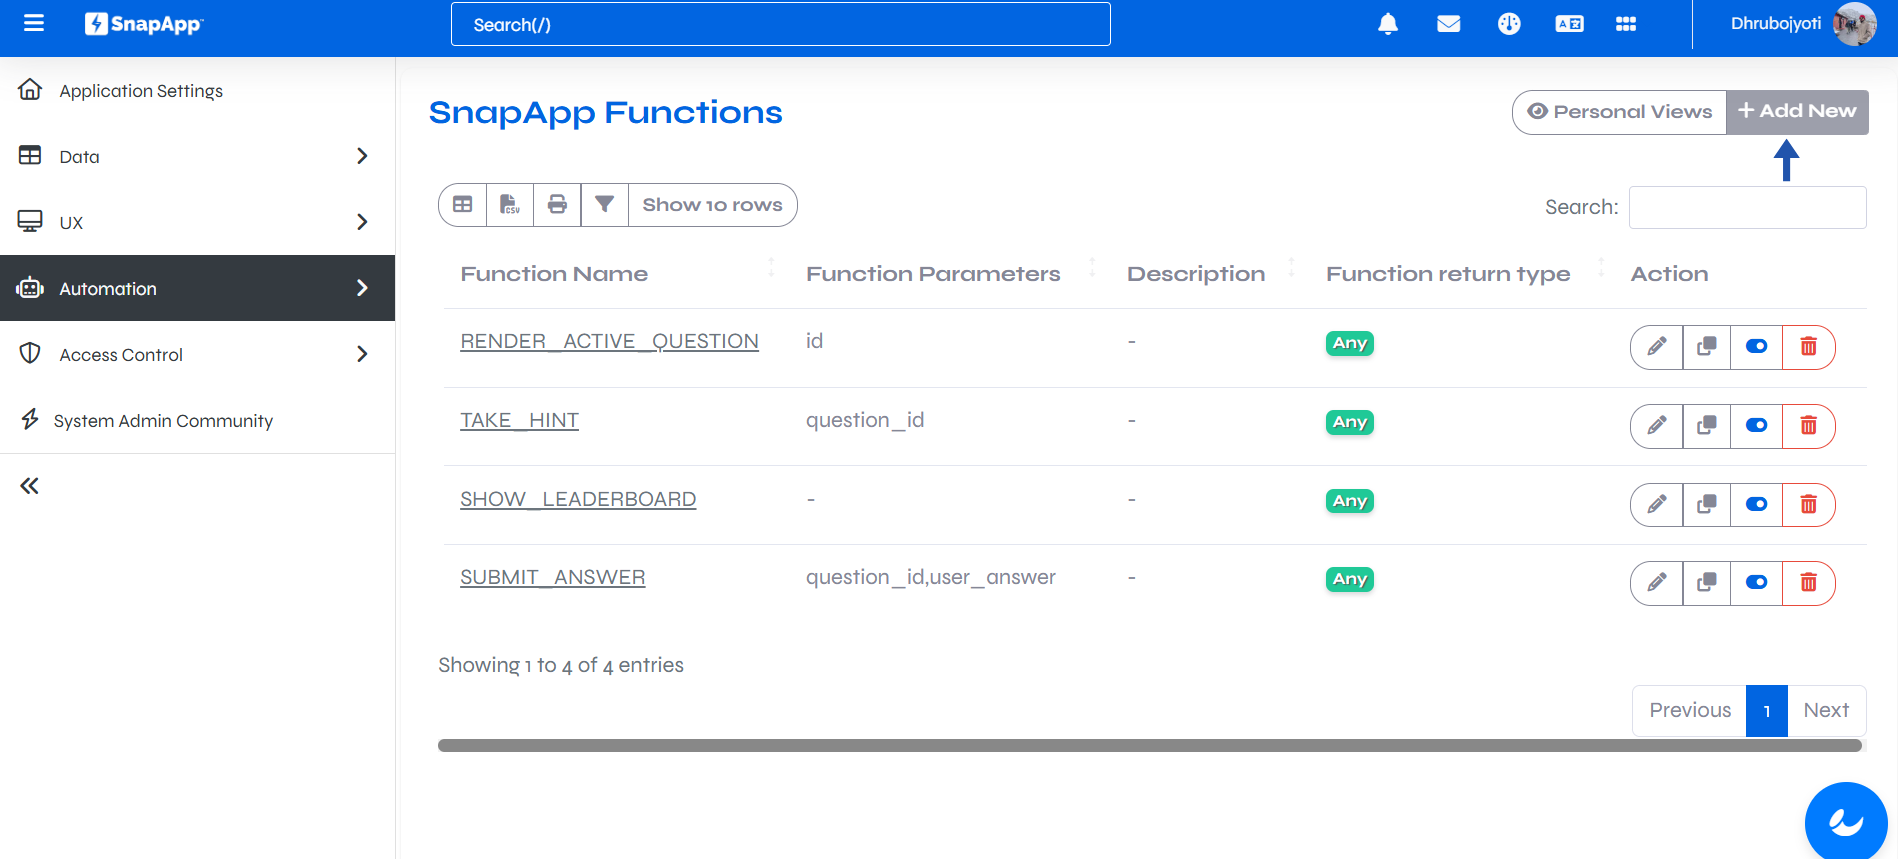
-
After clicking + Add New, the Create View for a custom SnapApp function opens.
-
Fill in the required details:
- **Function Name**  → Enter a unique name for the function.

- **Function Parameters** → Enter a comma-separated list of parameters to be passed to the function.

- **Function Parameter Count (optional)** → Enter the total number of parameters.

- **Description (optional)** → Explain what the function does in plain text.

- **Function Body** → Write the function logic.

- **Input Arguments** → Provide comma-separated input arguments required to execute the function.

- **Output** → Output generated by the function.

- **Function Example (optional)** → Provide a working example of the function call. *(like data type of syntax/output)*

- **Function Syntax** → Shows the syntax of the newly created function.

- **Function Return Type** → Select the data type of the returned value.
(like date, email, image, any, etc.)
- **Active** → Check **Active** to enable the function. 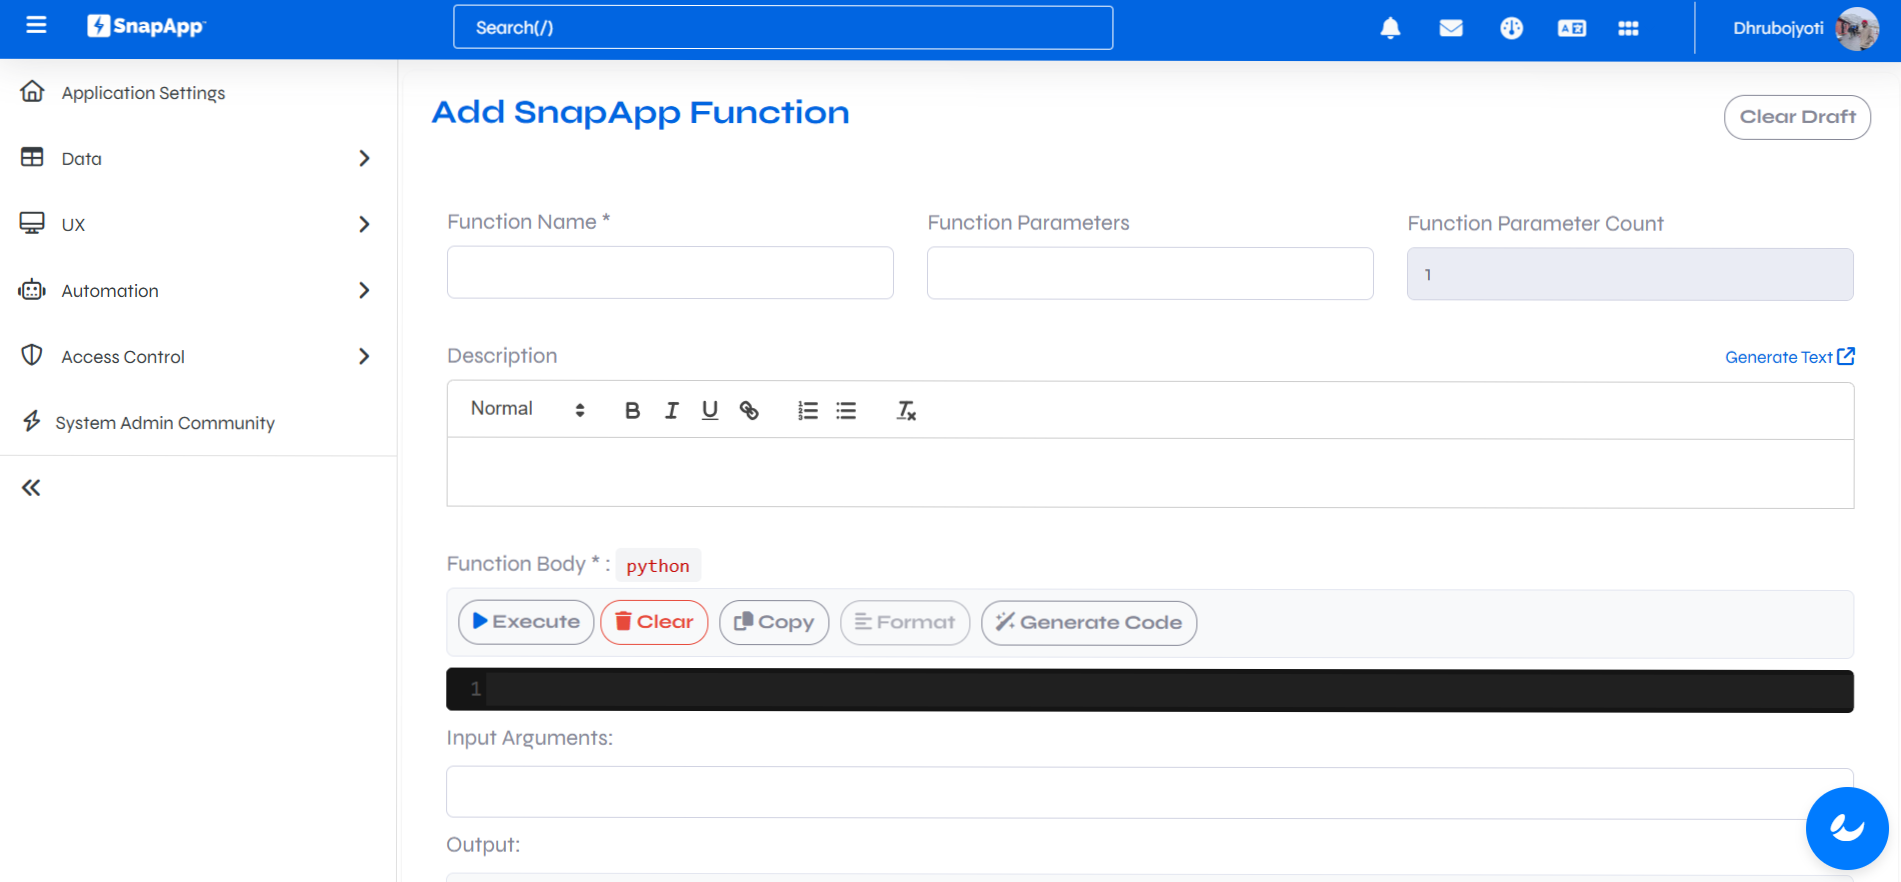 -
Click Save to create and activate the SnapApp function.
.png)
Example Function Body Snippet
- Function Body Snippet : (Multiple Record → Single User)
#Get the contact
contact = bv_core.get_row("contacts", id=contact_id)
if not contact:
return

# Get user linked to contact
user_id = contact.get("user_id")
if not user_id:
return

Fetch all projects
projects = bv_core.execute_query("""
SELECT id FROM projects
""")

# Loop through projects and create share records
for project in projects:
project_id = project.get("id")
if not project_id:
continue

# Check if share already exists
existing_share = bv_core.execute_query(f"""
    SELECT id FROM projects__shares
    WHERE record_id = '{project_id}'
      AND user_id = '{user_id}'
""")

if existing_share:
    continue

# Create share entry
bv_core.insert_row(
    "projects__shares",
    record_id=project_id,
    user_id=user_id,
    access_level="Update",   # Read / Update
    share_reason="Manually"
)
- Function Body Snippet : (Multiple Record → Multiple User)
for record_id in record_ids:          # multiple records
    for contact_id in contact_ids:    # multiple users

        contact = bv_core.get_row("contacts", id=contact_id)
        if not contact:
            continue

        user_id = contact.get("user_id")
        if not user_id:
            continue

        existing_share = bv_core.execute_query(f"""
            SELECT id FROM test_plans__shares
            WHERE record_id = '{record_id}'
              AND user_id = '{user_id}'
        """)

        if not existing_share:
            bv_core.insert_row(
                "test_plans__shares",
                record_id=record_id,
                user_id=user_id,
                access_level="Update",
                share_reason="Manually"
            )
II. Create a Workflow and Establishing Sharing Rules
- Go to Workflows. (Learn More about Workflows here.)
- Click the + Add New button and create a Workflow.
.png)
- After filling the necessary details, in the Create-View modal, click Save.
.png)
- After saving, you will be automatically redirected to the Detail-View of the workflow.
- In the workflow Detail View, scroll down to the Actions section.
- In the Actions section, click +Add New.
.png)
- The Create Action view opens.
- Enter a name for the action.
- From the Type, select Integration.
- Under Integration options, choose Custom Function.
-
Fill in the required details for the custom function:
- SnapApp Function: Select the custom SnapApp function that you have created.
- Function Arguments: Provide the required input parameters for the selected function.
- Description: Briefly explain what the action does.
- Workflow Sequence: Define the execution order of this action within the workflow.
- Active: Enable the action to make it functional.
-
Click Save.
.png)
Note: The sharing rule has been successfully established.
Delete a Sharing Rule
To delete a Sharing Rule:
- Open Settings from the User menu.
- Select Sharing Rules from the Access Control menu.
- Search the Sharing Rule in the list that you want to delete.
- Click the Delete button.
Thank you for following these steps to Create Sharing Rules effectively. If you have any questions or need further assistance, please don’t hesitate to reach out to our support team. We’re here to help you make the most out of your SnapApp experience.
For support, email us at snapapp@bluevector.ai