List View
on 01-26-2026 12:00 AM by SnapApp by BlueVector AI
2743
List View
A List View presents data in a vertical list format, allowing users to efficiently scroll through and view multiple records sequentially. It is designed to display key information prominently, making data management and navigation intuitive for new users.
Table of Contents
- How to create a List View
- Different features of List View Builder
- Setting Up Inline Editing
- Advanced Customization & Filtering
- Managing Your View
How to create a List View
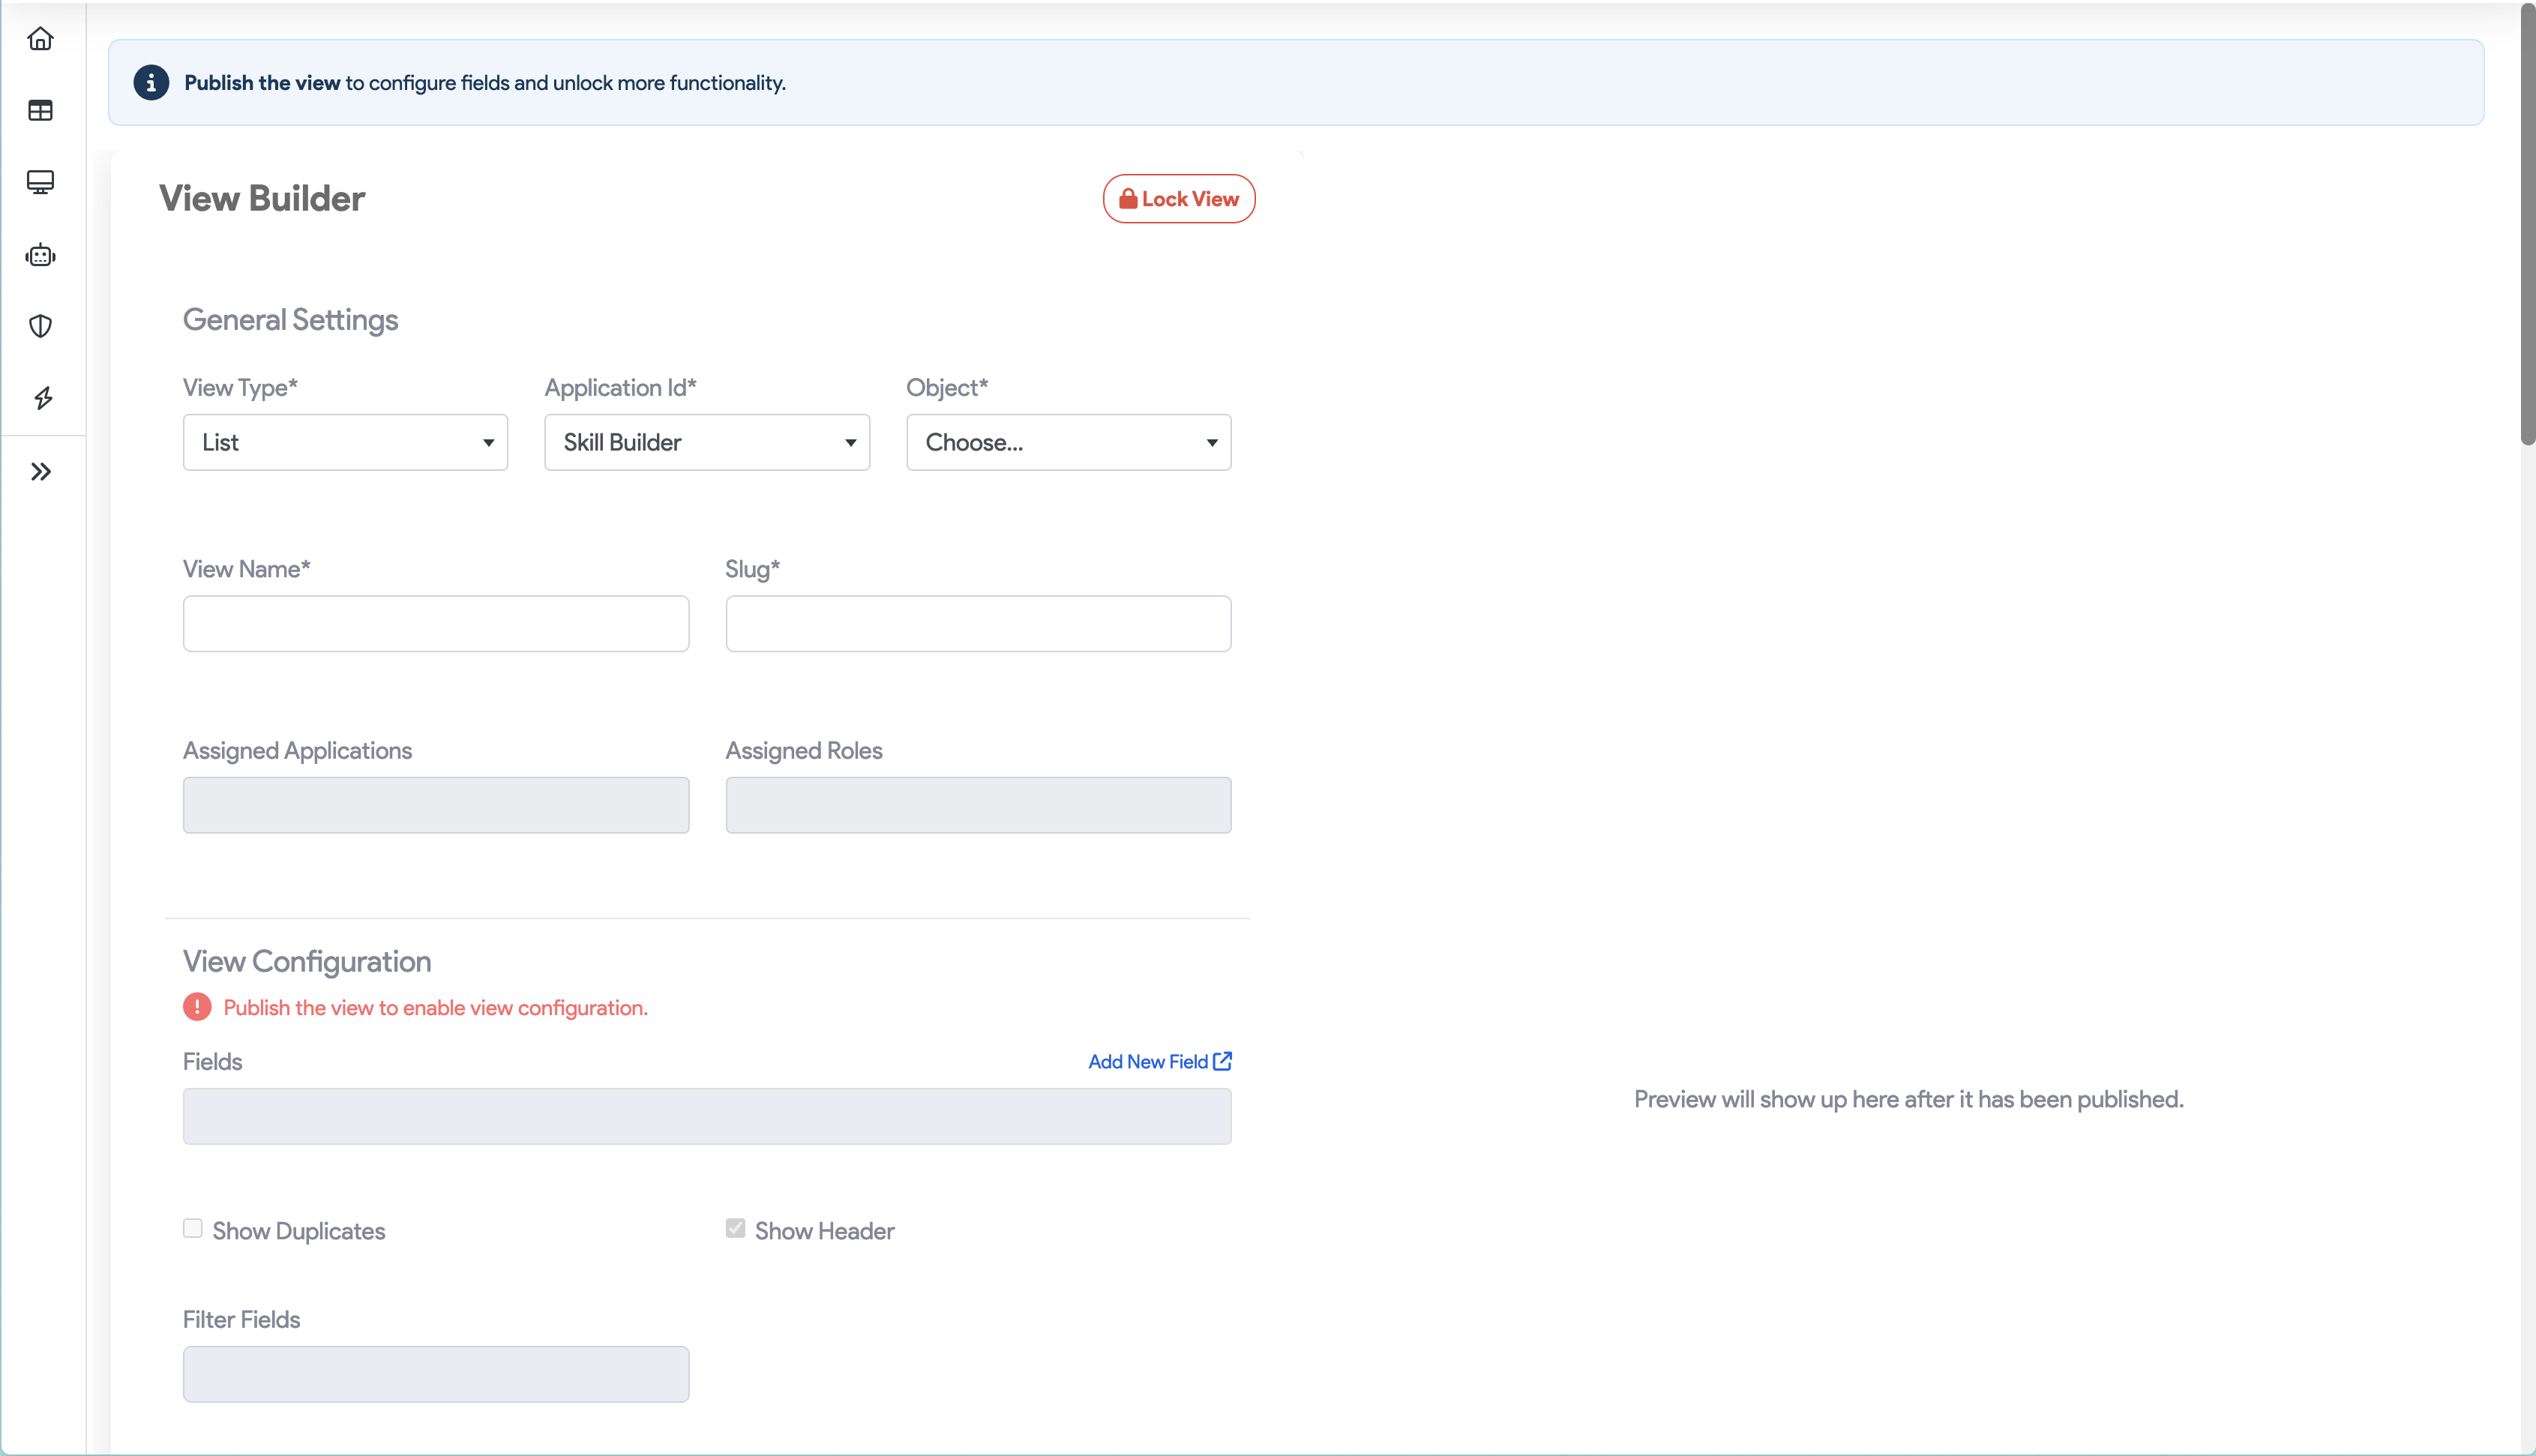
If you are brand new to SnapApp, creating a List View is often the first step in making your data accessible to users.
- Navigate to the View Builder within your application settings.
- Choose List View as your View Type.
- Select the Application ID and the Object (the data source) you want to display.
- Provide a View Name and a Slug (the unique URL path).
.png)
Note: After setting the general settings, you must Publish the view before continuing with additional configuration.
Different features of List View Builder
The builder provides several configuration blocks to customize how your data looks and behaves:
| Feature Category | Description |
|---|---|
| General Settings | Defines the core identity of the view, including its name, slug, and associated object. |
| View Configuration | Controls columns (Fields), sorting (Order By), and row visibility. |
| Security Settings | Sets the visibility of the view to either Public or Private. |
| Advanced Settings | Configures Drilldown Options (what happens when you click a record) and Sidebar Options for extra context. |
| UI Customization | Allows for Custom Labels and Custom Buttons to match your application’s specific workflows. |
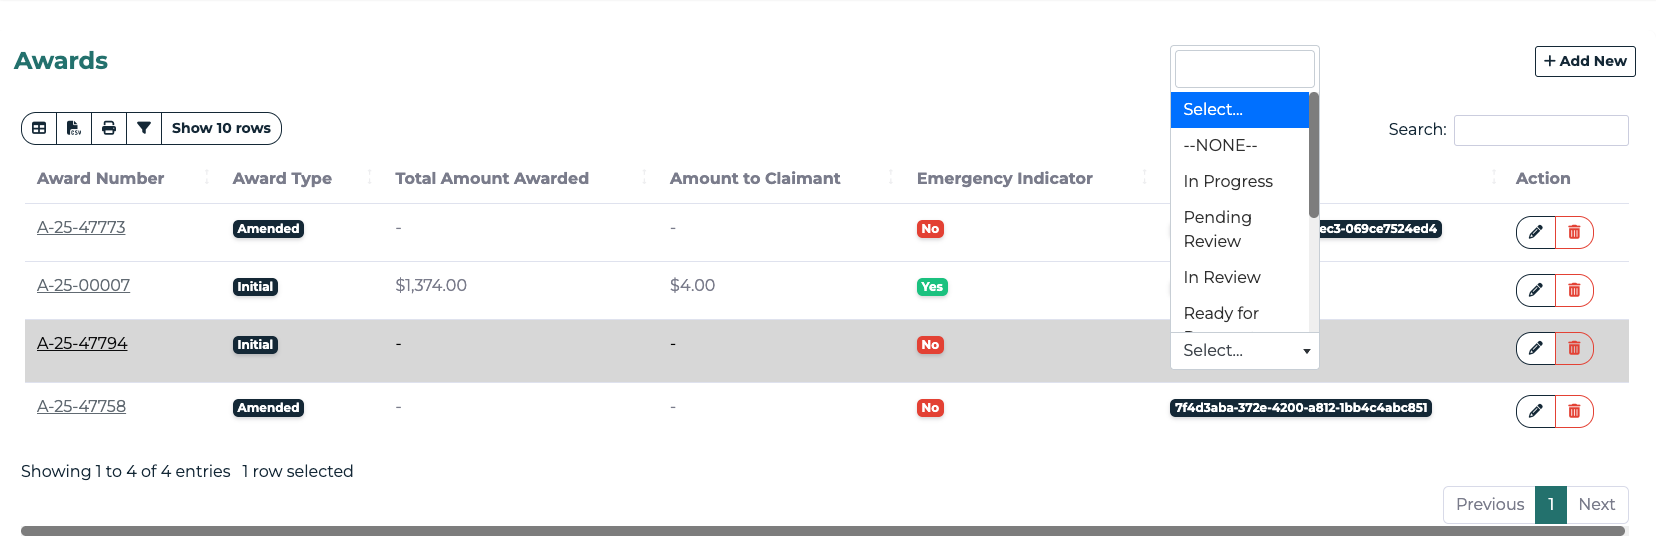
Setting Up Inline Editing
Inline Editing allows users to update record data directly from the list interface without navigating to a separate Form View.
- A pencil icon will appear next to a field that is able to be inline edited

- Clicking the pencil will expose the list of options to choose from
Steps to Configure:
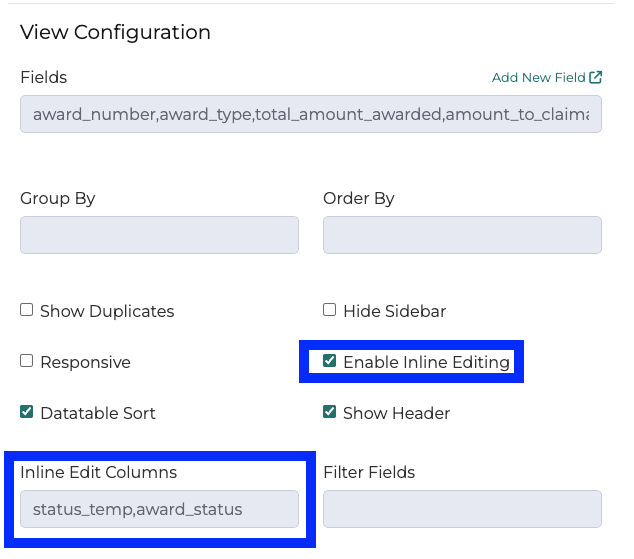
- In the View Configuration section, locate the Enable Inline Editing checkbox.
- Click the checkbox to activate the feature.
- Once enabled, use the Inline Edit Columns dropdown to select the specific fields you want to make editable.
- Note: Only columns selected here will allow user input within the list.
- (Optional) Use Datatable Sort to define the initial sorting logic for your editable table.
Advanced Customization & Filtering
- Drilldown Options: You can set your List View to open a Detail View, Inspector View, or Form View when a user clicks on an individual record.
- Filter Settings: Use the Expression Builder under Conditions to limit which records appear in the list based on specific criteria.
- Responsiveness: Ensure the Responsive checkbox is active so your list remains usable on both desktop and mobile devices.
- Sidebar Configuration: Choose a view or feed to display in a sidebar, and set the Sidebar Size (default is 25% of the screen).
Managing Your View
Once your List View is configured, use these actions to finalize it:
- Preview: Use the preview icon to see exactly how the list will appear to your end-users before going live.

-
Publish: Makes the view accessible within your application.

-
Edit/Delete: You can return to the builder at any time to modify fields or remove the view if it is no longer needed.
.png)
.png)
Thank you for following these steps to configure your SnapApp components effectively If you have any questions or need further assistance, please don’t hesitate to reach out to our support team. We’re here to help you make the most out of your SnapApp experience.
For support, email us at snapapp@bluevector.ai