Access Controls (Queues)
on 09-30-2024 12:00 AM by SnapApp by BlueVector AI
1062

Table of Contents
- Queues
- What is a Queue?
- What are Queue Objects?
- What are Queue Members?
- Create a Queue
- Configure a Queue
- Add Members to a Queue
- Add Objects to a Queue
- Assign to Queue – Implementation Details
- View the Queue Configuration
- Delete a Queue
Queues

What is a Queue?
Queues are a core access-control and workload-management feature in SnapApp. They help distribute records or tasks efficiently among users while maintaining clear ownership, visibility, and control.
A Queue is a logical container that groups users (Queue Members) and records or entities (Queue Objects) to enable automated and controlled access of data.
What are Queue Objects?
Queue Objects are the records or entities that are routed through a queue.
Each queue object:
-
Represents a specific object in the database (for example, tasks, projects etc).
-
Determines what kind of records are assigned through the queue.
-
Uses an assignment strategy such as Assign to Queue, Round Robin or workload-based distribution.
What are Queue Members?
Queue Members are users who are part of a queue and are eligible to access records from the Queue Objects.
Each queue member:
-
Represents an individual user.
-
Can be marked as active or inactive within the queue.
-
Participates in assignment logic (for example, Round Robin distribution).
Create a Queue
To create a queue:
- Open Settings from the User menu.
- Select User from the Access Control dropdown menu.
- Click
+Add Newin the top header of the Queues list view to add a new Queue →Save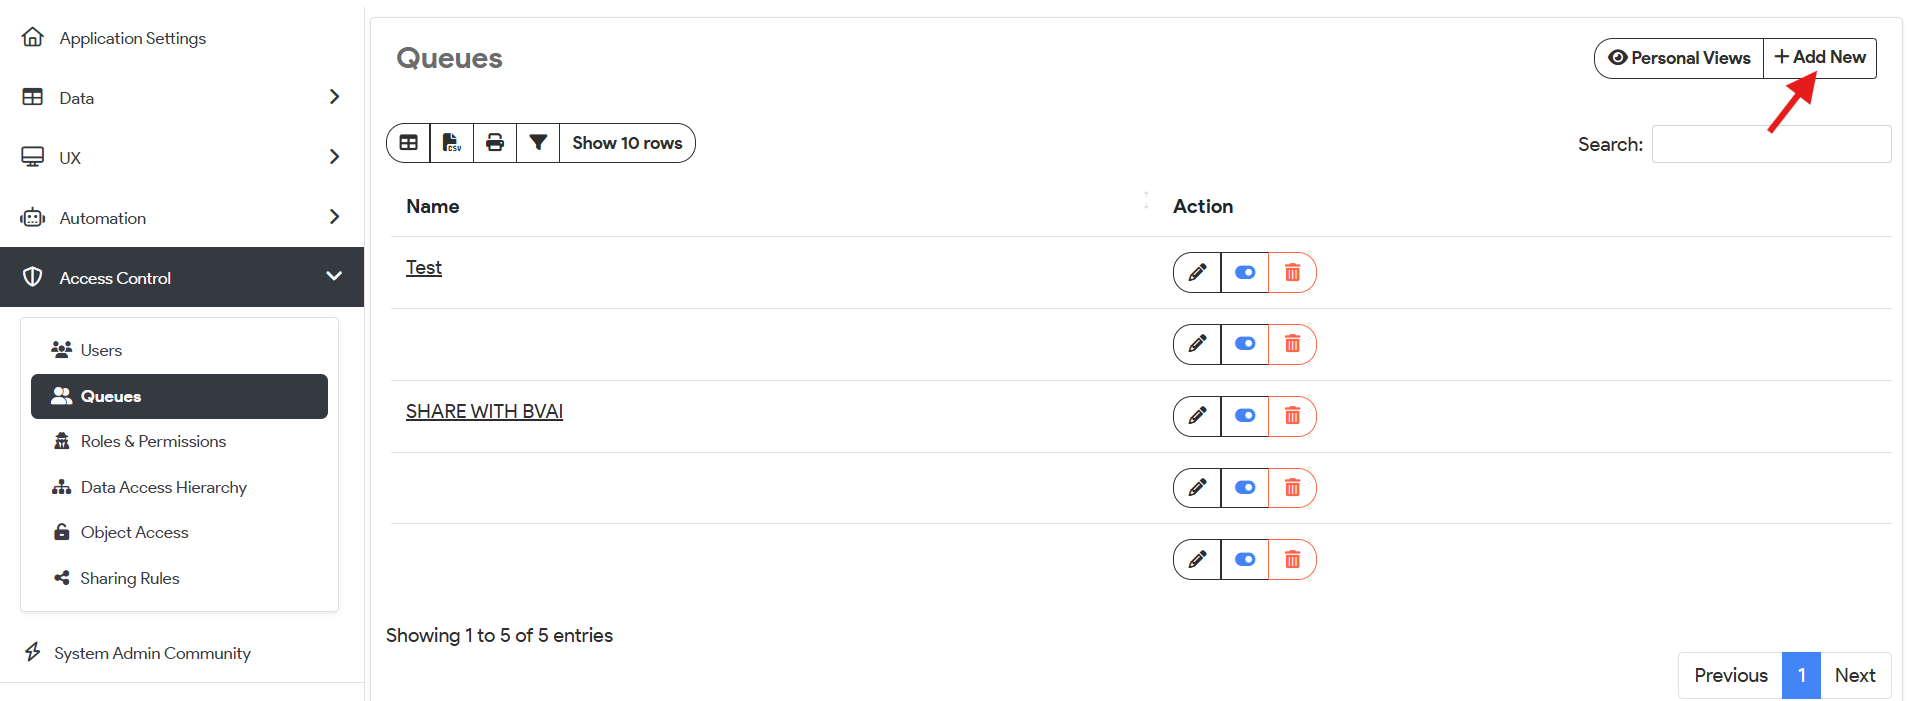
Click on the **Save** button 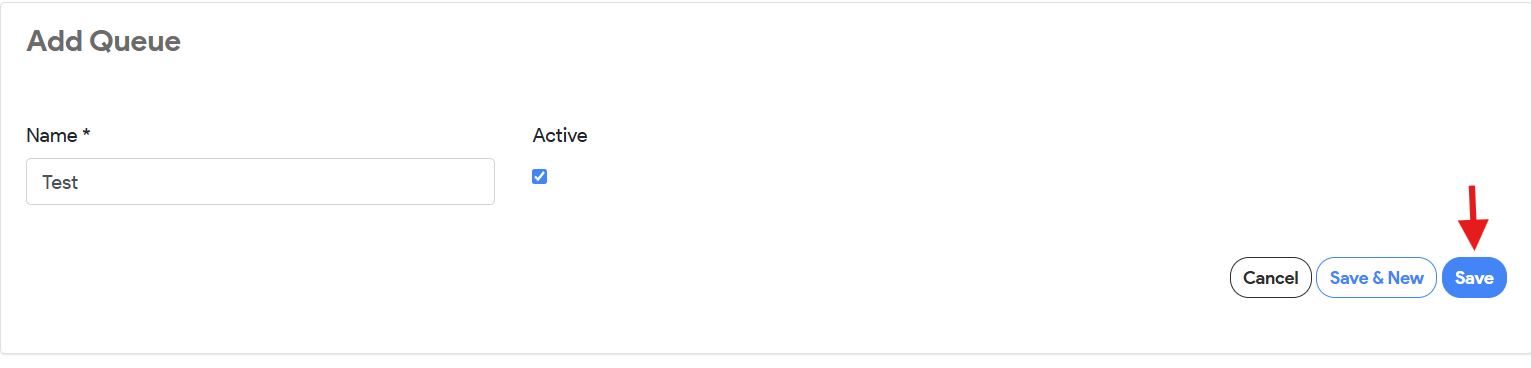
Configure a Queue
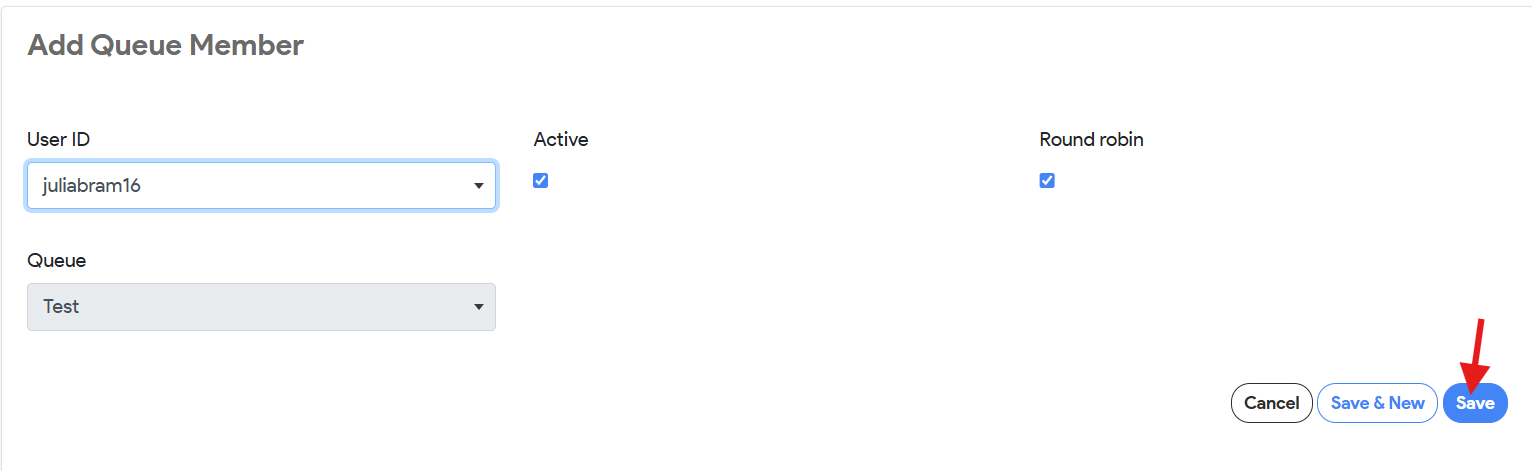
Add Members to a Queue
- From the **Queues list view, select the name of the Queue you wish to configure.
-
Select +Add New Queue Member from the Queue Members table.

-
Configure the Member settings:
| Setting | Description |
|---|---|
| User | Select the user to assign to the queue. It is a ref field to the users object which fetches dynamic user records from the object. If not present, add a user by clicking +Add New Item in the dropdown. |
| Active | Checkbox to signify the member’s status in the queue. |
| Round Robin | Checkbox for the queue type. Default is Round Robin, signifying a first-in-first-out assignment. |
- Click on Save button to save your configurations.
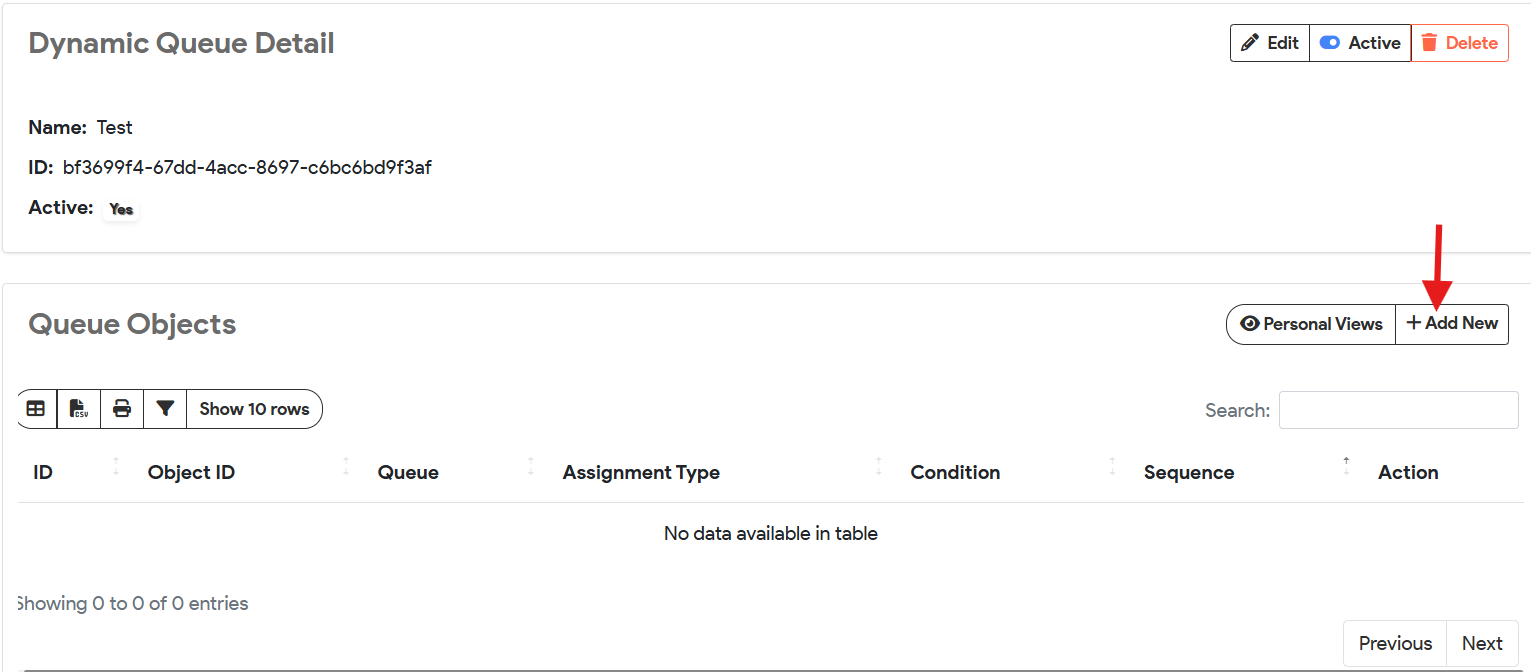
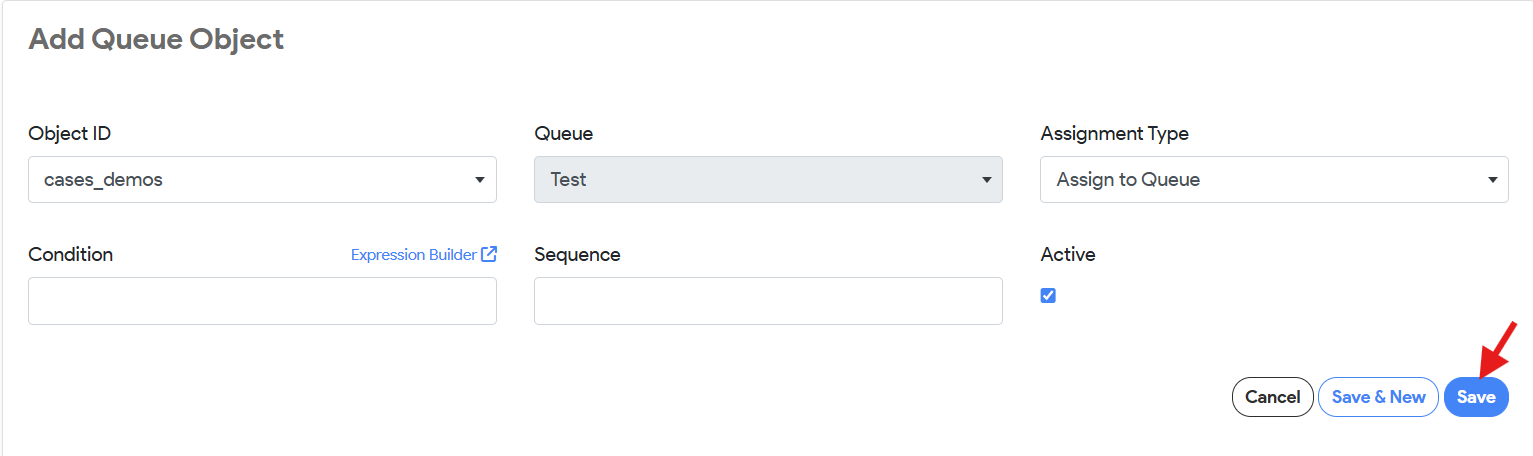
Add Objects to a Queue
- From the Queues list view, select the name of the Queue you wish to configure.
- Select +Add New Queue Object from the Queue Objects table.
- Configure the Object settings:
| Setting | Description |
|---|---|
| Object | Select the object to assign to the queue. It is a ref field to the objects which lists down all the objects in the database. If not present, create an object by clicking +Add New Item in the dropdown. |
| Active | Checkbox to signify the object’s status in the queue. |
| Assignment Type | Dropdown for the queue type. Round Robin signifies a first-in-first-out assignment. Assign to Queue signifies that any record added to the object will be automatically have the owner_type as queue and owner_id as the queue_id. |
- Click on the Save button to save your configurations.
Assign to Queue – Implementation Details
Before a queue is applied, records created for the cases_demos object are assigned directly to the creating user. In this state:
- owner_type is set to User
- owner_id is set to the user_id of the record creator
This behavior represents the default ownership model, where records are owned and managed individually.
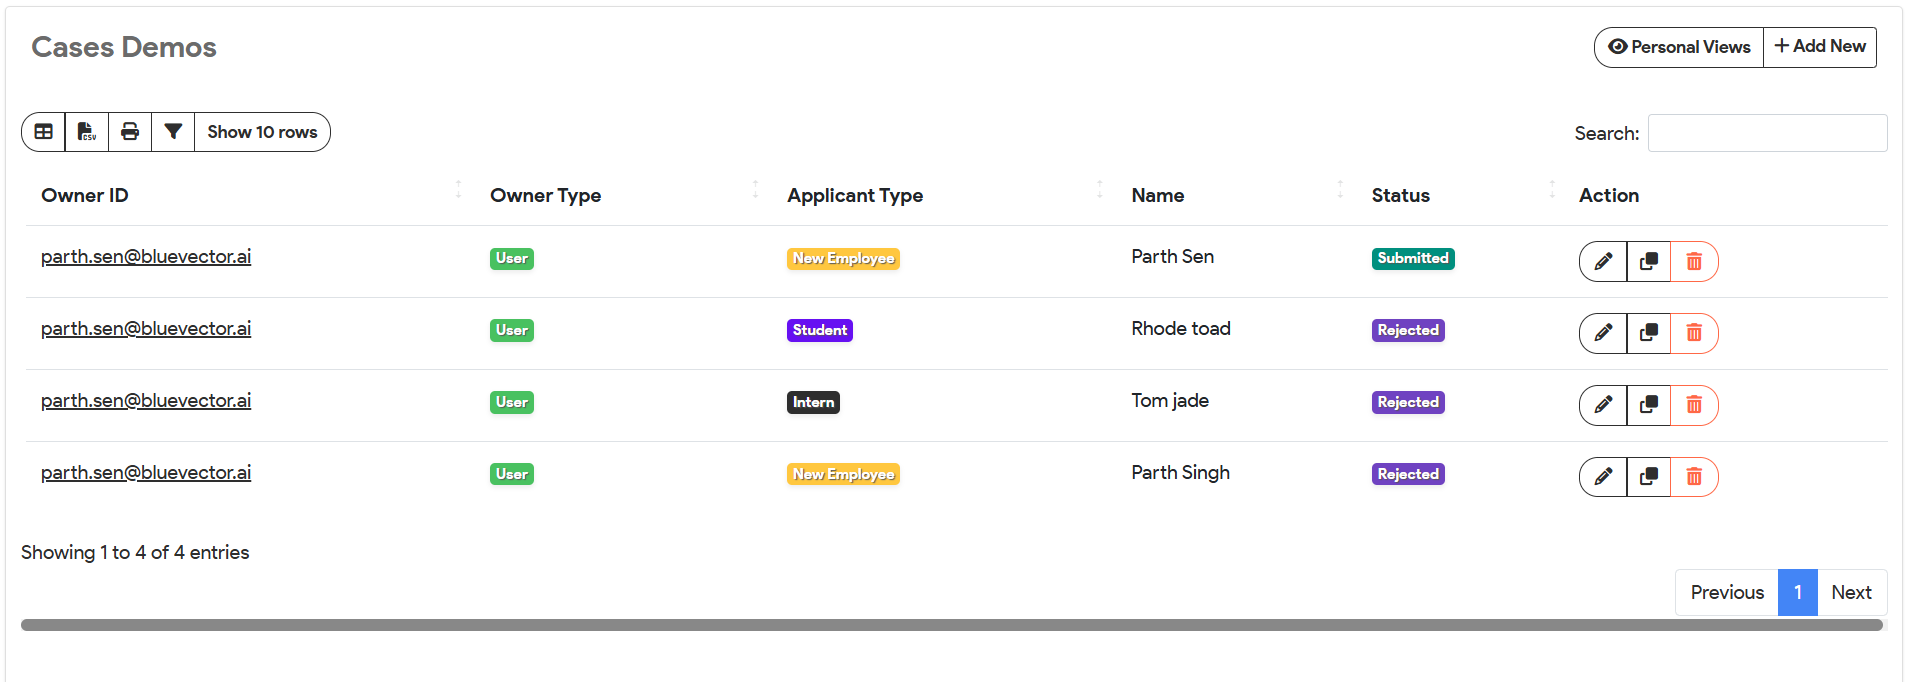
Once the cases_demos object is added to a queue (for example, the Test queue), the ownership model changes automatically for newly created records. From this point onward:
- owner_type is set to Queue
- owner_id is set to the corresponding Queue ID (in this case, Test)
This ensures that all new records are owned by the queue rather than an individual user, enabling centralized assignment and controlled workload distribution based on the queue’s configuration.

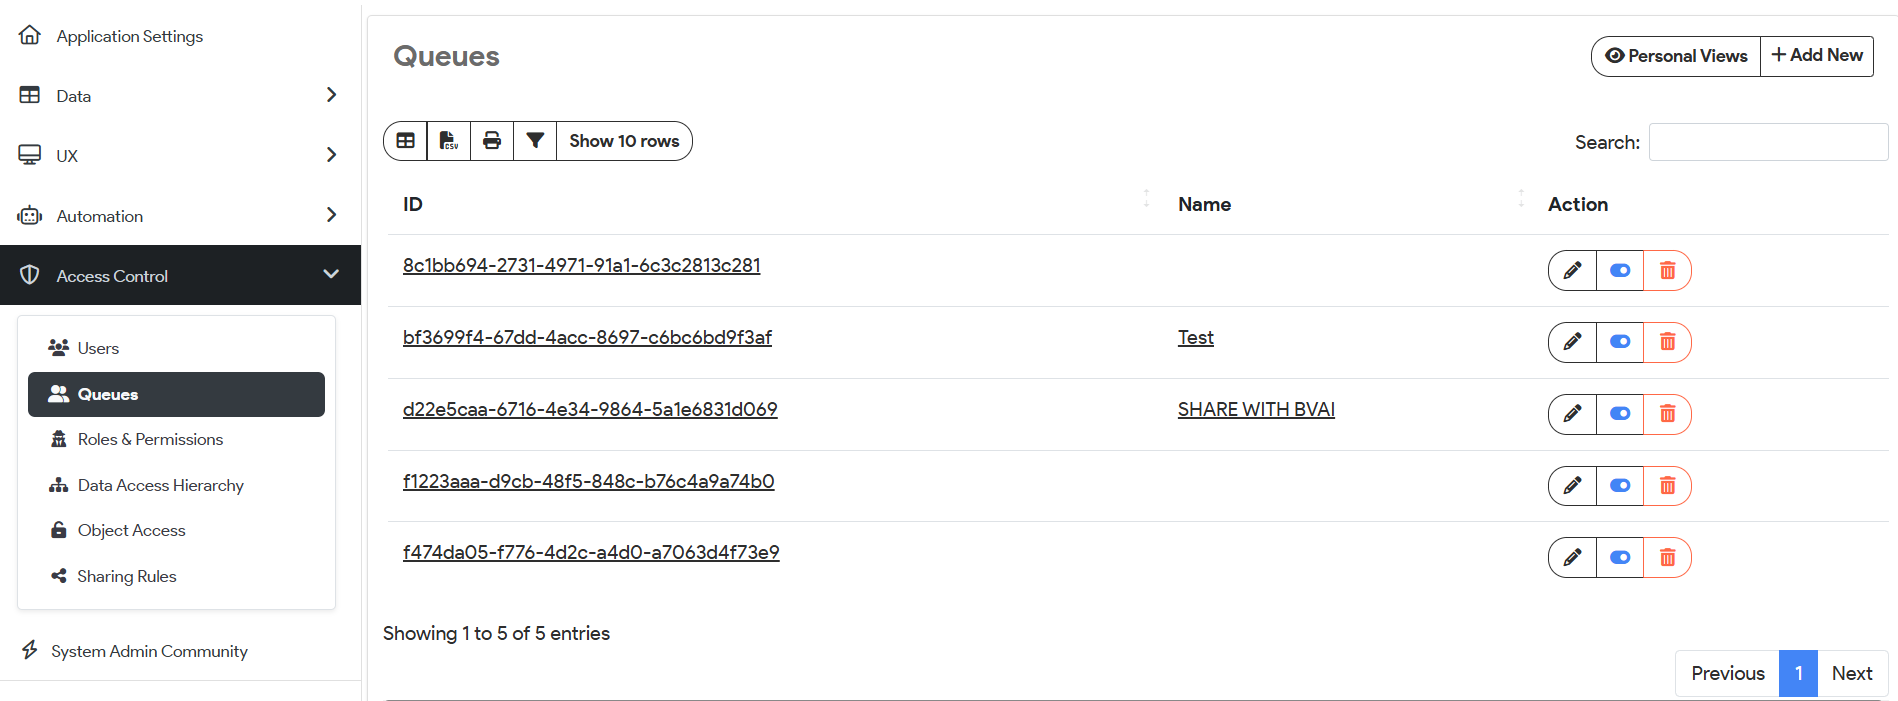
View the Queue Configuration
To view the queue configuration:
- Open Settings from the User menu.
- Select Queues from the Access Control menu.
- Select the queue in the list that you want to view.
- Click the queue name or ID to be taken to the detail view.
Delete a Queue
To delete a Queue:
- Open Settings from the User menu.
- Select Queues from the Access Control menu.
- Search for the Queue in the list that you want to delete →
Delete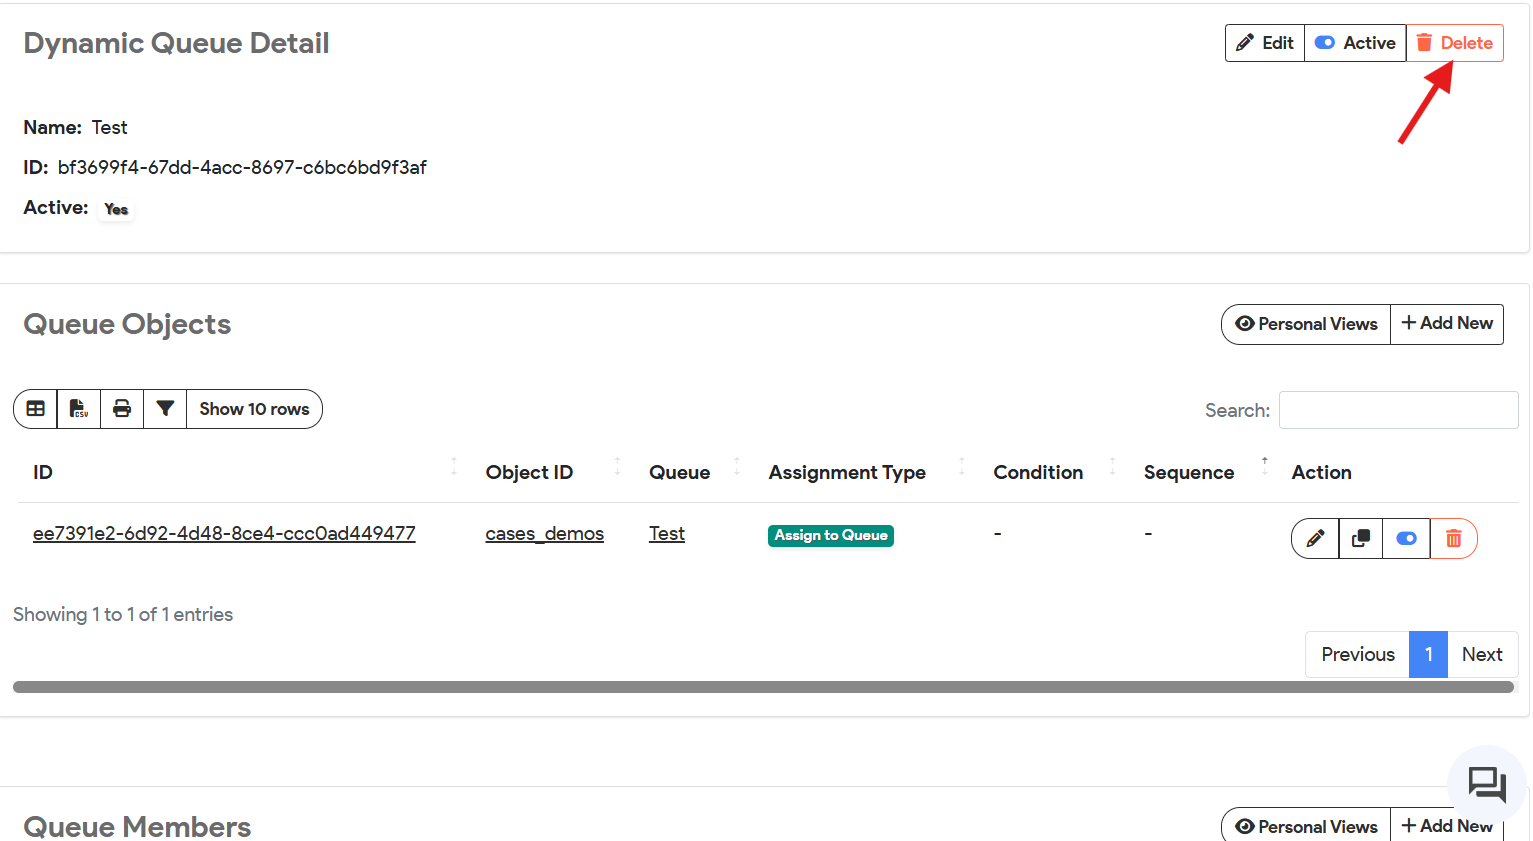
Click on **Continue with Deletion** to finally delete the queue 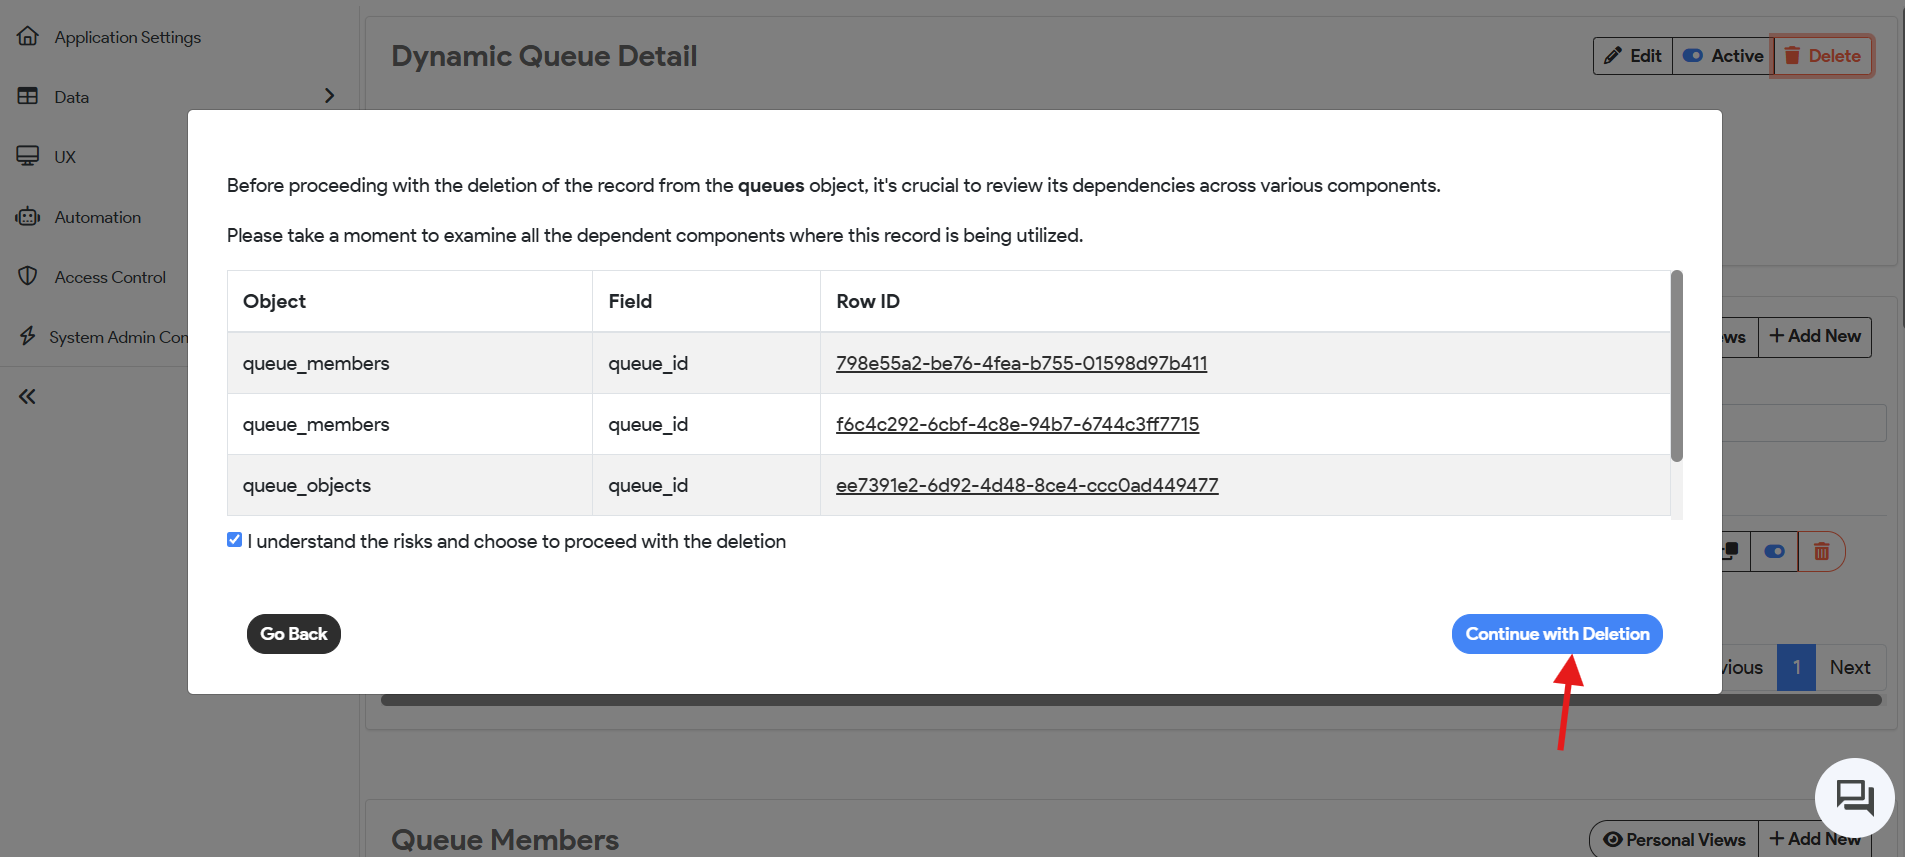
Note: The Delete button is visible only if you have Delete permissions in one of the permission sets assigned to your user role. Different queue members can have different levels of access to an individual record even after being members in the same queue. This is because of the Role ID and Data Access Role ID of individual users which have different sets of permissions.
Thank you for following these steps to effectively manage your SnapApp access control (Object access) settings. If you have any questions or need further assistance, please reach out to our support team. We’re here to help you get the most out of your SnapApp experience.
For support, email us at snapapp@bluevector.ai