SnapApp Functions
on 01-16-2026 12:00 AM by SnapApp by BlueVector AI
3602
SnapApp Functions
SnapApp Functions extend SnapApp Expressions and other SnapApp application logic by enabling the implementation of custom Python functions. This integration provides enhanced flexibility and customization within your SnapApp environment by leveraging Python’s capabilities to perform application-specific tasks or calculations.
Table of Contents
- Steps to Implement a SnapApp Function
- 1. Navigate to the SnapApp Function Setup
- 2. Add a New Function
- 3. Define Function Details
- 4. Add Function Parameters
- 5. Write the Function Body
- 6.Test the Function
- 7. Provide Function Examples (Optional)
- 8. Final Configuration
Steps to Implement a SnapApp Function
1. Navigate to the SnapApp Function Setup
- Go to Settings → Automation → SnapApp Function from the navigation bar.
.png)
.png)
.png)
2. Add a New Function
- Click the + Add New button in the list view header at the top.
- You will be redirected to the Create View.
.png)
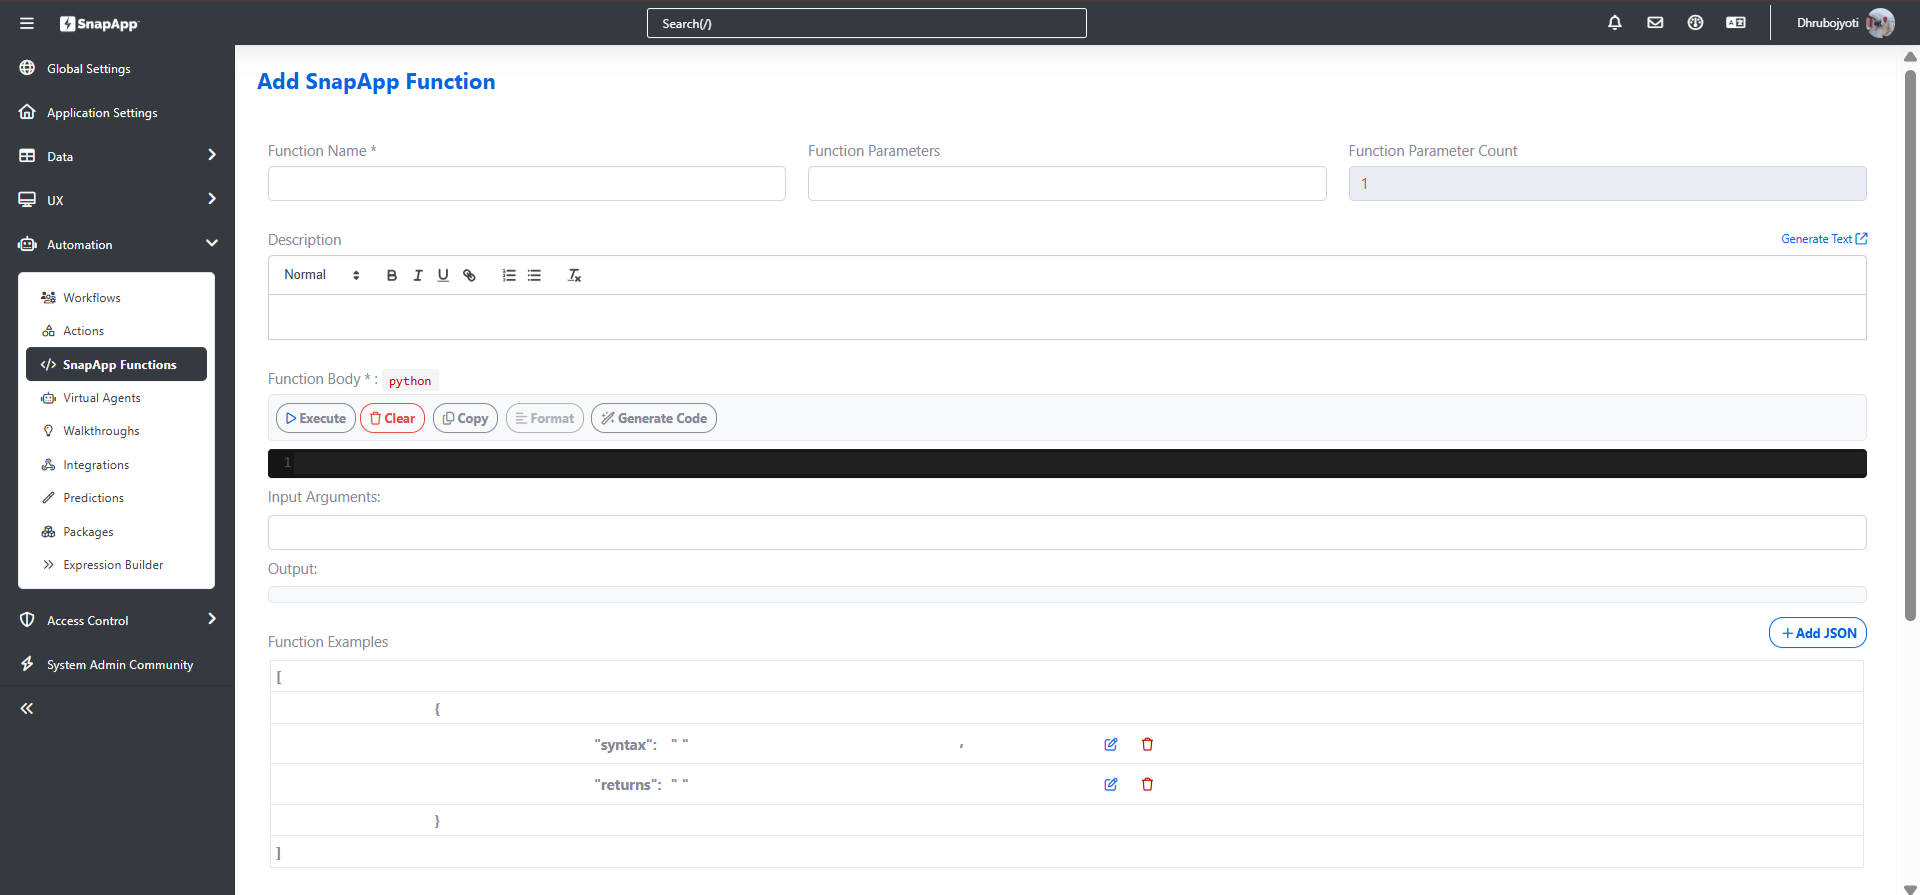
3. Define Function Details
- Function Name Enter a name for the function.
-
For consistency, use:
- Uppercase letters with underscores:
FUNCTION_NAME - Or lowercase letters:
function_name
- Uppercase letters with underscores:
-
Description Provide a brief description explaining the purpose of the function.
4. Add Function Parameters
- Enter parameters in the Function Parameters field as a comma-separated list.
Example:
param_1, param_2
5. Write the Function Body
- In the Function Body field, type or paste your Python code.
- You can also generate code automatically by clicking the Generate Code button and providing a prompt.
6.Test the Function
-
Enter values in the Input Arguments field.
-
Click Execute to test the function.
-
The result will be displayed in the Output field.
7. Provide Function Examples (Optional)
- Provide example usage of the function to demonstrate the type of input it accepts and the output it returns. Examples must be defined in the following JSON format:
[
  {
    "syntax": "data_type_of_input",
    "returns": "data_type_of_output_value"
  }
]
8. Final Configuration
-
Select the appropriate Return Type from the dropdown.
-
Set the Active field to Yes to enable the function.
-
Click on Save the configuration.
.png)
Thank you for following these steps to configure your SnapApp components effectively If you have any questions or need further assistance, please don’t hesitate to reach out to our support team. We’re here to help you make the most out of your SnapApp experience.
For support, email us at snapapp@bluevector.ai