SnapApp View Configuration: Step-by-Step Guide for Beginners
on 01-30-2026 12:00 AM by SnapApp by BlueVector AI
3519
Introduction
A View in SnapApp is like a window to see your data. You can create Views to show records, edit information, or create new entries. This guide will walk you through every step in simple language so even if you are new, you can easily create and manage Views.
Table of Contents
- Create a New View
- Preview a View
- Publish a View
- Edit a View
- Delete a View
- View Versions
- Visibility Settings
- reCAPTCHA in Create View
- Mobile View
- Custom Labels
- Record Button Labels
- Custom Buttons
- Slug
- Field Visibility in Lists
- Sidebar
- Inline Editing in List View
- Document AI Validation for Inspector View
- Redirect URL
- Filter Settings and Conditions
- How to Use Filters Step by Step
- Example
Create a New View
Follow these steps carefully to create a new View:
- Open Settings
- Click on your User menu in the top-right corner of SnapApp.
- Choose Settings.
Tip: Settings is where all customization happens, so this is your starting point.
- Go to UX
- In the left-hand navigation menu, find and click UX.
Explanation: UX (User Experience) controls how your data is displayed and interacted with.
- Select Views
- Under the UX menu, click Views.
Tip: This is the list of all existing Views. You will see “Add New” to create a fresh View.
- Click + Add New
- Look at the top-right corner and click + Add New.
Result: You will now enter the View Builder, where you can choose fields, layout, filters, and more.
Preview a View
Before you make your View public, it’s a good idea to preview it.
- Go to Settings > UX > Views.
- Open your View in the View Builder.
- Scroll to the bottom and click Preview.
Why: Preview helps you check if the View looks correct and behaves as expected before users see it.
Publish a View
After previewing and confirming the View looks right:
- Go to Settings > UX > Views.
- Open your View in the View Builder.
- Scroll to the bottom and click Publish.
Explanation: Publishing makes the View available to users. Until you publish, it stays in draft mode.
Edit a View
To make changes to a View you already created:
- Go to Settings > UX > Views.
- Find the View you want to change and click Edit.
- Make the required changes in the View Builder.
- Save or Publish after editing.
Tip: You can change fields, layout, labels, and filters while editing.
Delete a View
If you no longer need a View:
- Go to Settings > UX > Views.
- Click the View you want to delete.
- Tap Delete and confirm.
Warning: Deleted Views cannot be recovered, so double-check before deleting.
View Versions
Each time you publish, SnapApp saves a new version.

Note: You can switch between versions anytime, which is helpful if something goes wrong after an update.
Visibility Settings
Choose who can see your View:
- Private: Only users who log in with permissions can see it.
- Public: Anyone can access it without logging in.


Note: Use Public for shared pages or forms, Private for internal data.
reCAPTCHA in Create View
reCAPTCHA protects your View from spam or bots.

Explanation: SnapApp uses reCAPTCHA to ensure only humans can submit forms or data.
Mobile View
Views can appear differently on mobile devices. Make sure you select the correct View for mobile.


Note: Always test on a mobile device if users will access it from phones.
Custom Labels
You can change the text on buttons.
Example:
"Save": "Save Here" → The button will show Save Here instead of “Save.”
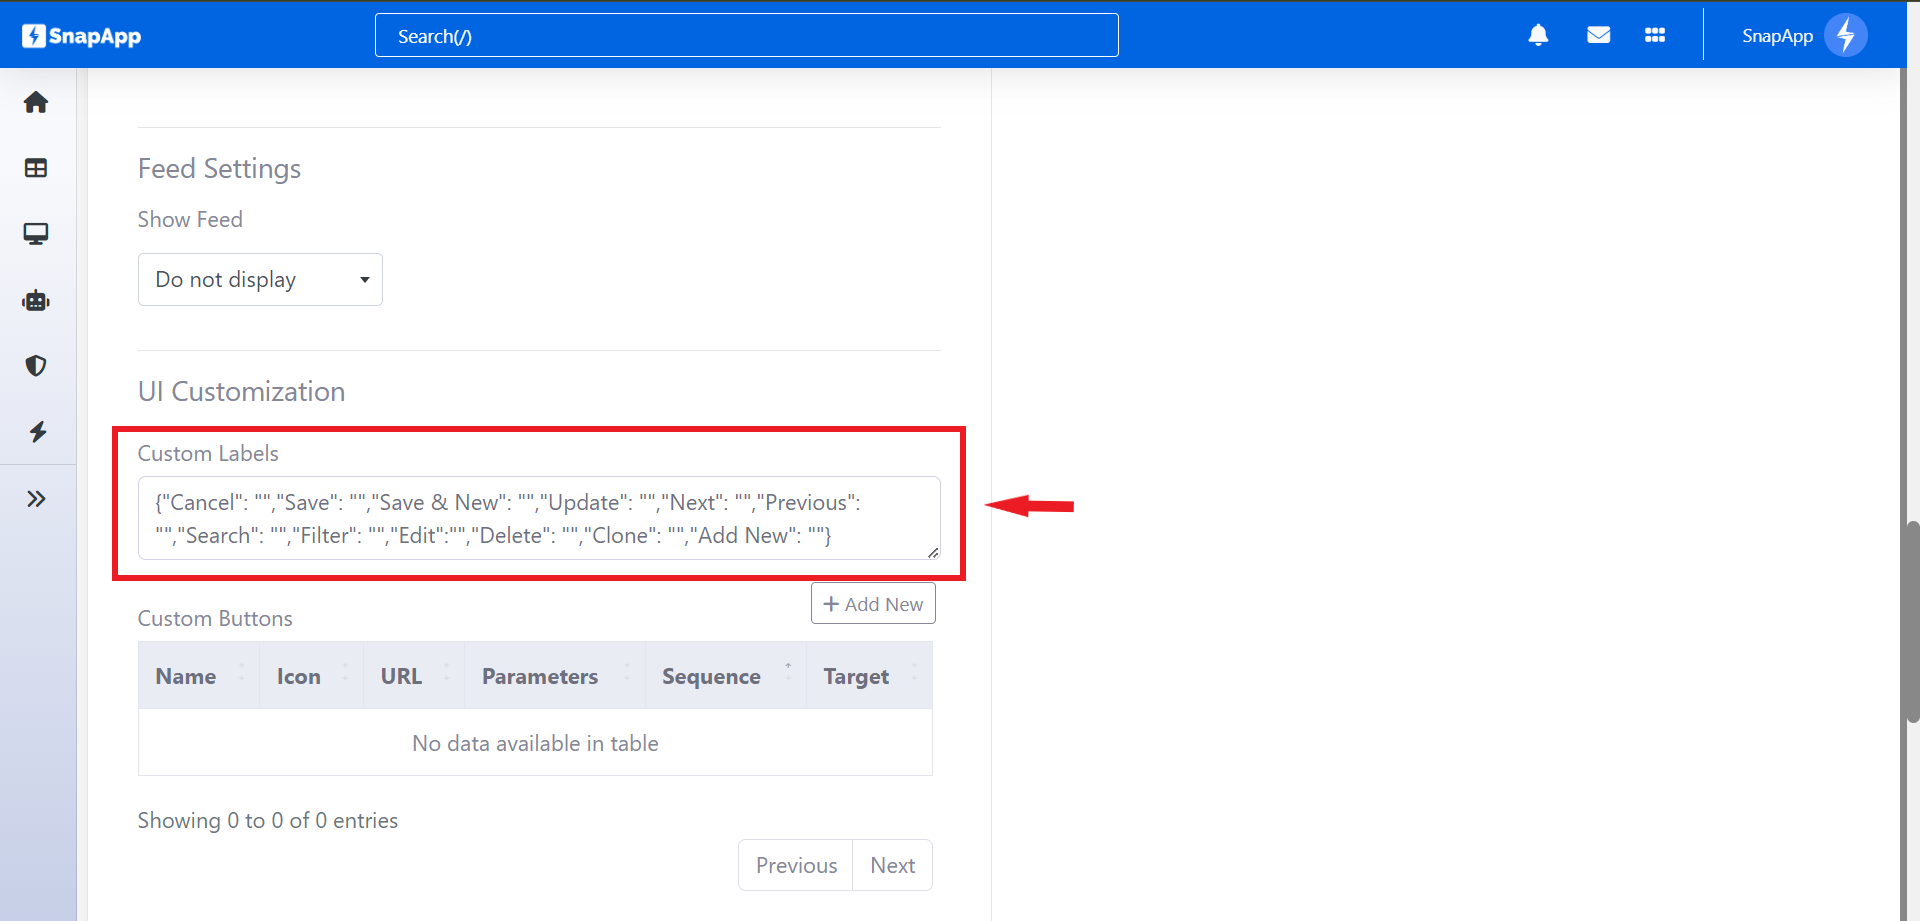
Record Button Labels
Enable this checkbox if you want the text label to appear with button icons.

Custom Buttons
Create a button and link it to:
- Workflow
- Action
- URL


Slug
A slug creates a readable URL for your View.
Without slug:
prod.snapapp.ai/page/1234567890876543234567890
With slug:
prod.snapapp.ai/page/SnapApp-Low-Code-App-Builder-Training
Note: Always use slugs for easy sharing and readability.
Field Visibility in Lists
Choose which fields to show in a View and which to hide.


Note: Keep the list clean by only showing important fields.
Sidebar
Add a sidebar button to open another View. Choose the type and size.


Inline Editing in List View
Double-click a field in a list to edit it directly.

Note: Great for fast edits without opening each record.
Document AI Validation for Inspector View
Inspector View shows attachments related to a record. Use DocAI to validate and extract information.

Redirect URL
Redirect a View to another View or Page. Works for single-record Views like Detail, Form, or Create View.

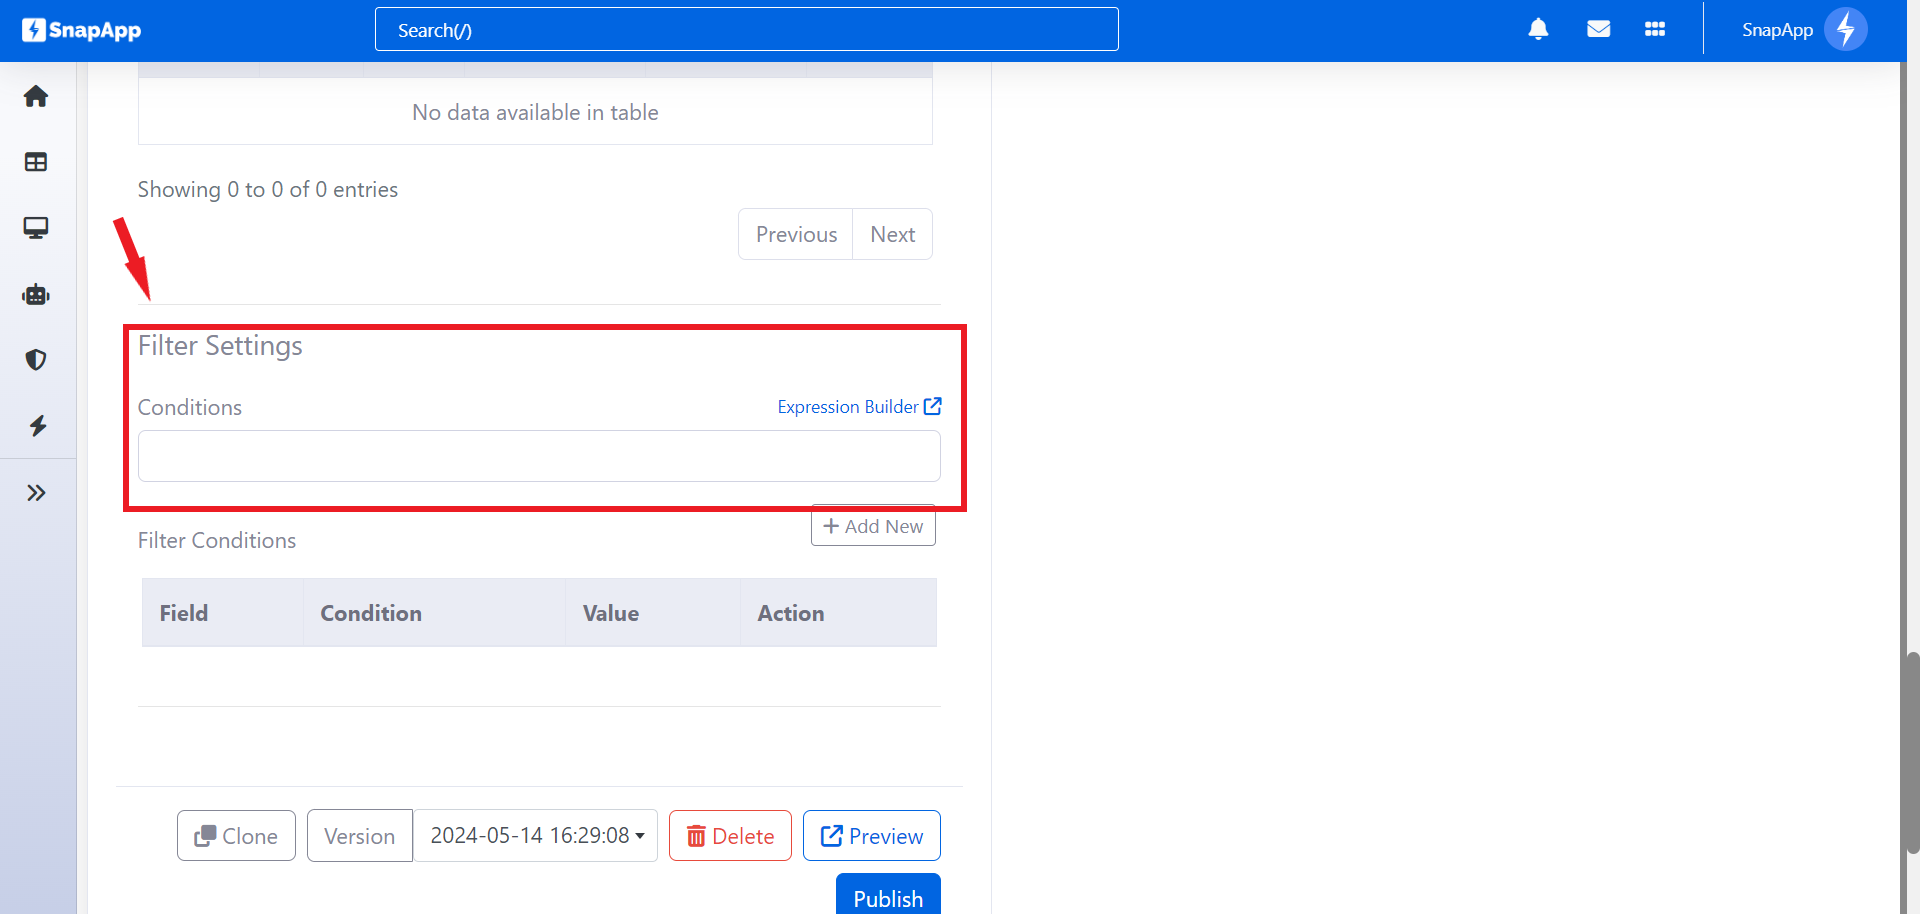
Filter Settings and Conditions
Filters let you control which records appear in your View. This is useful when you want to show only specific data, like records that are “Pending” or belong to a certain user. In SnapApp, you use the Expression Builder to create these filters.
How to Use Filters Step by Step
- Open the View Builder
- Go to Settings > UX > Views.
-
Click Edit on the View you want to filter.
-
Find the Filter Section
- Scroll down to the Filter Settings area.
-
Click Add Filter or open the Expression Builder.
-
Choose a Field to Filter
- Select the field you want to filter by. For example,
Status. -
This determines which column or property of your records you want to apply the condition to.
-
Set the Condition
- Pick a condition such as:
Equals→ Only show records that exactly match a value.Contains→ Show records that include a certain text.Greater than / Less than→ For numeric or date fields.
Example: To show only pending tasks, choose: Status Equals "Pending"
-
Add Multiple Conditions (Optional)
-
You can add more conditions to filter further.
- Use AND if you want all conditions to be true.
-
Use OR if you want records that meet any one condition.
-
Save and Preview
-
Once your filter is ready, click Save.
- Use Preview to check that only the records you want are displayed.
Example
If you only want to show tasks that are pending and assigned to John, you can create two conditions:
Status Equals "Pending" AND Assigned To Equals "John"
This ensures your View is focused and clutter-free.

Note: Filters are powerful! Use them to hide irrelevant records and make your View easier to read. Always preview your filter to confirm it works correctly.
Thank you for following these steps to configure your SnapApp components effectively If you have any questions or need further assistance, please don’t hesitate to reach out to our support team. We’re here to help you make the most out of your SnapApp experience.
For support, email us at snapapp@bluevector.ai