Format Rules in SnapApp
on 02-01-2026 12:00 AM by SnapApp by BlueVector AI
3422
Format Rules
Format Rules in SnapApp™ enable you to personalize how data is displayed throughout your application based on specific logic. By defining expressions, you can dynamically adjust the visual properties of data fields—such as text color, background highlights, and icons—whenever a record meets a set condition.
Table of Contents
- How Format Rules Work
- Key Visual Properties:
- 1. Access the Format Rules List
- 2. Define Rule Logic and Style
- 3. Customize Visual Elements
- Support
How Format Rules Work
Format rules act as conditional styles. Unlike static formatting, these rules only apply when a specific Expression evaluates to true. For example, you can create a rule that turns a “Status” field green only when it is marked as “Complete”.
Key Visual Properties:
- Icons: Display specific symbols alongside data to provide quick visual cues (e.g., a checkmark for “Verified”).
- Text Color: Change the font color of the field value to draw attention or indicate state.
- Highlight Color: Define a background color to be applied to the data field for maximum scannability.
- Text Style: Apply formatting such as Bold, Italic, or Underline.
1. Access the Format Rules List
- Navigate to the Data menu in the sidebar.
- Select Format Rules from the list of data management tools.
- Click the + Add New button in the top header.

2. Define Rule Logic and Style
On the Add Format Rule screen, fill out the following fields:
| Field | Description |
|---|---|
| Name | Provide a unique name for the rule (e.g., “High Priority Highlight”). |
| Object ID | Select the object this format rule will apply to from the dropdown. |
| Expression | Enter the logical condition that will determine how the format rule applies. You can click Expression Builder to open the visual logic editor. |
| Fields | Specify which columns in the object will receive the formatting. |
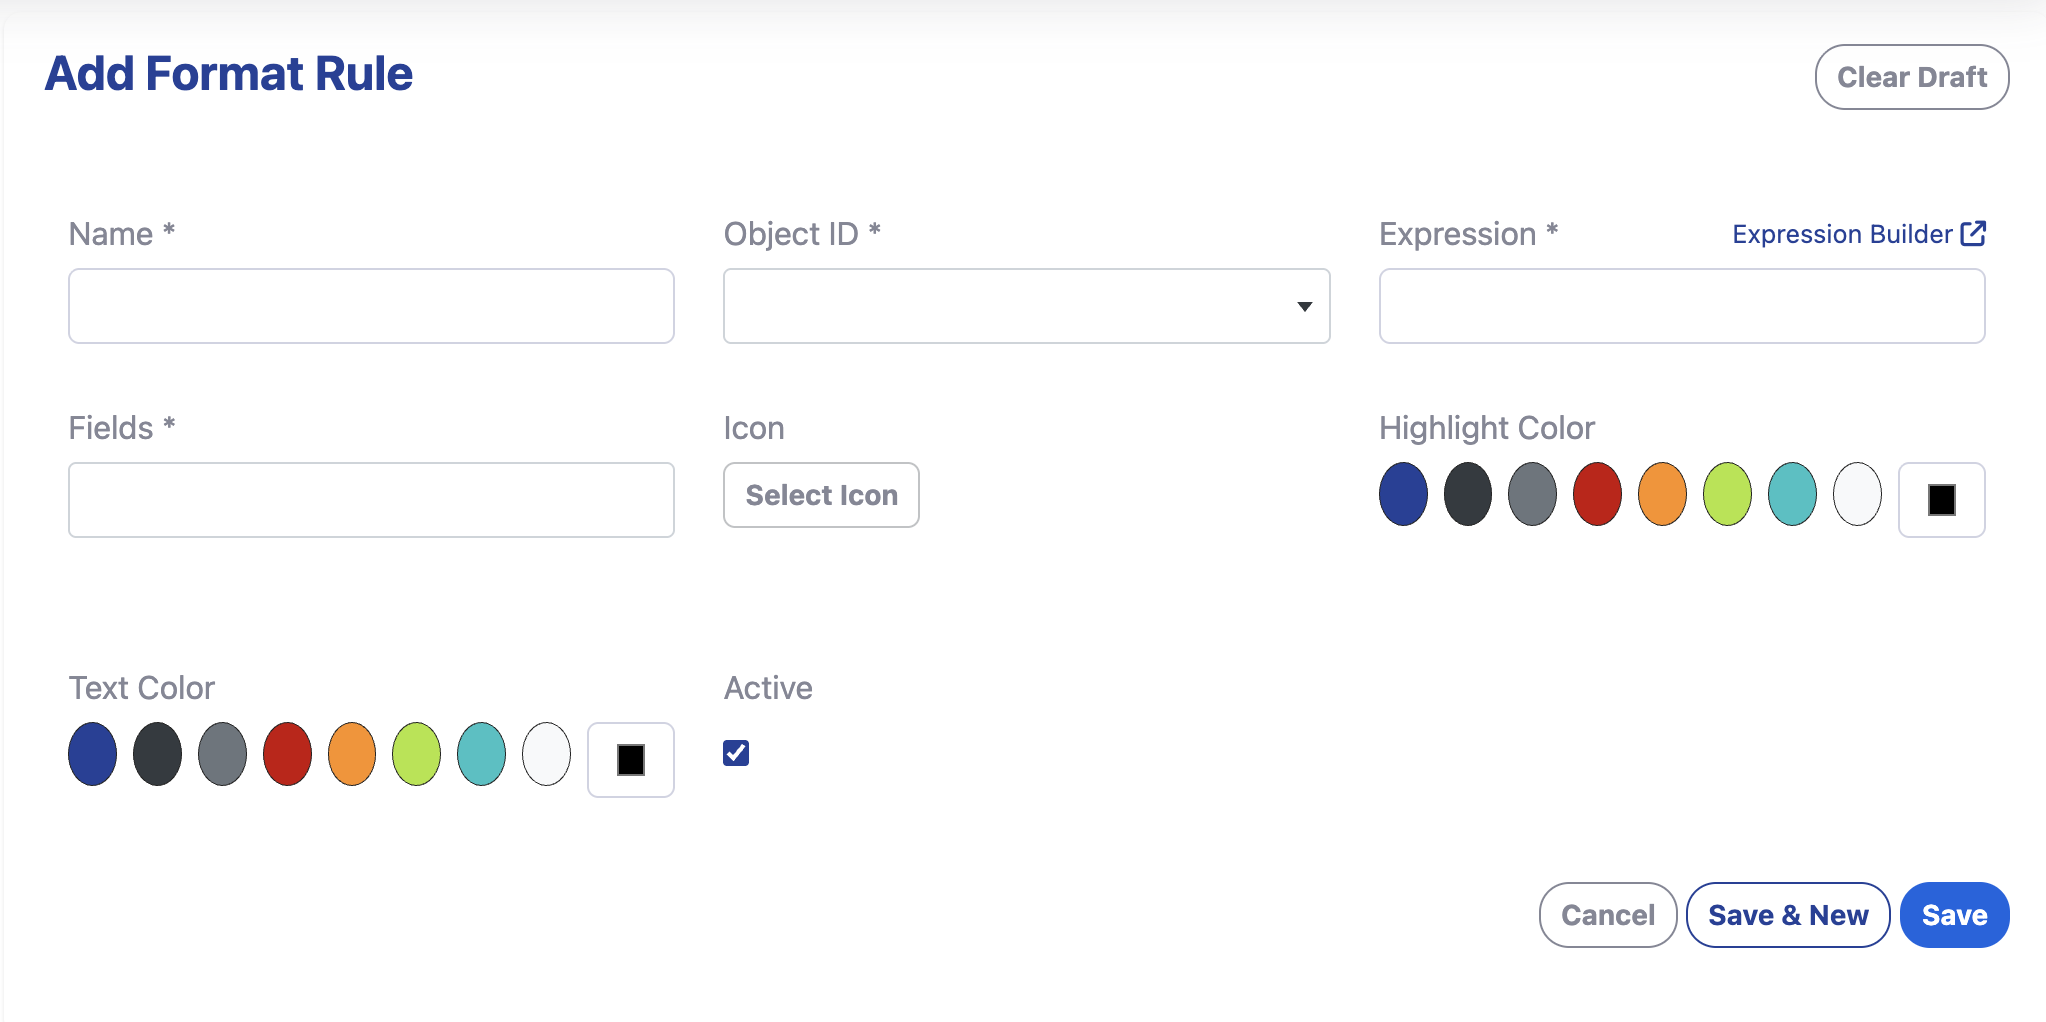
3. Customize Visual Elements
Apply the desired visual cues that the end user will see when the expression evaluates to true:
- Icon: Click Select Icon to add a visual symbol next to the data.
- Highlight Color: Select a background color from the palette or define a custom hex code.
- Text Color: Choose the font color for the field values.
- Active: Ensure the checkbox is selected to enable the rule immediately.
Click Save to complete the setup or Save & New to create another rule.
Once created, rules appear in the Format Rules list view.
Support
For support, email us at snapapp@bluevector.ai