Workflow Actions - Data Migration
on 01-23-2026 12:00 AM by SnapApp by BlueVector AI
3304
Actions: Data Migration
The Data Migration Action is a specialized workflow component in SnapApp that allows you to automate the movement, transformation, and synchronization of data between external systems and your SnapApp Objects. Unlike static imports, this action is designed to be a repeatable part of your application’s business logic, capable of running automatically based on schedules or specific system events.
Table of Contents
- 1. Prerequisites: Creating the Data Migration
- 2. Configuration Guide
- Action Fields
- 3. Automation & Triggers
- 4. Why Use Data Migration Actions?
- Monthly Data Exporting & Reporting
- Legacy System Integration
- Support
1. Prerequisites: Creating the Data Migration
Before you can add a Data Migration Action to a workflow, you must first define the migration logic. This is done in the Data Migrations module to ensure that the logic is reusable across multiple workflows.
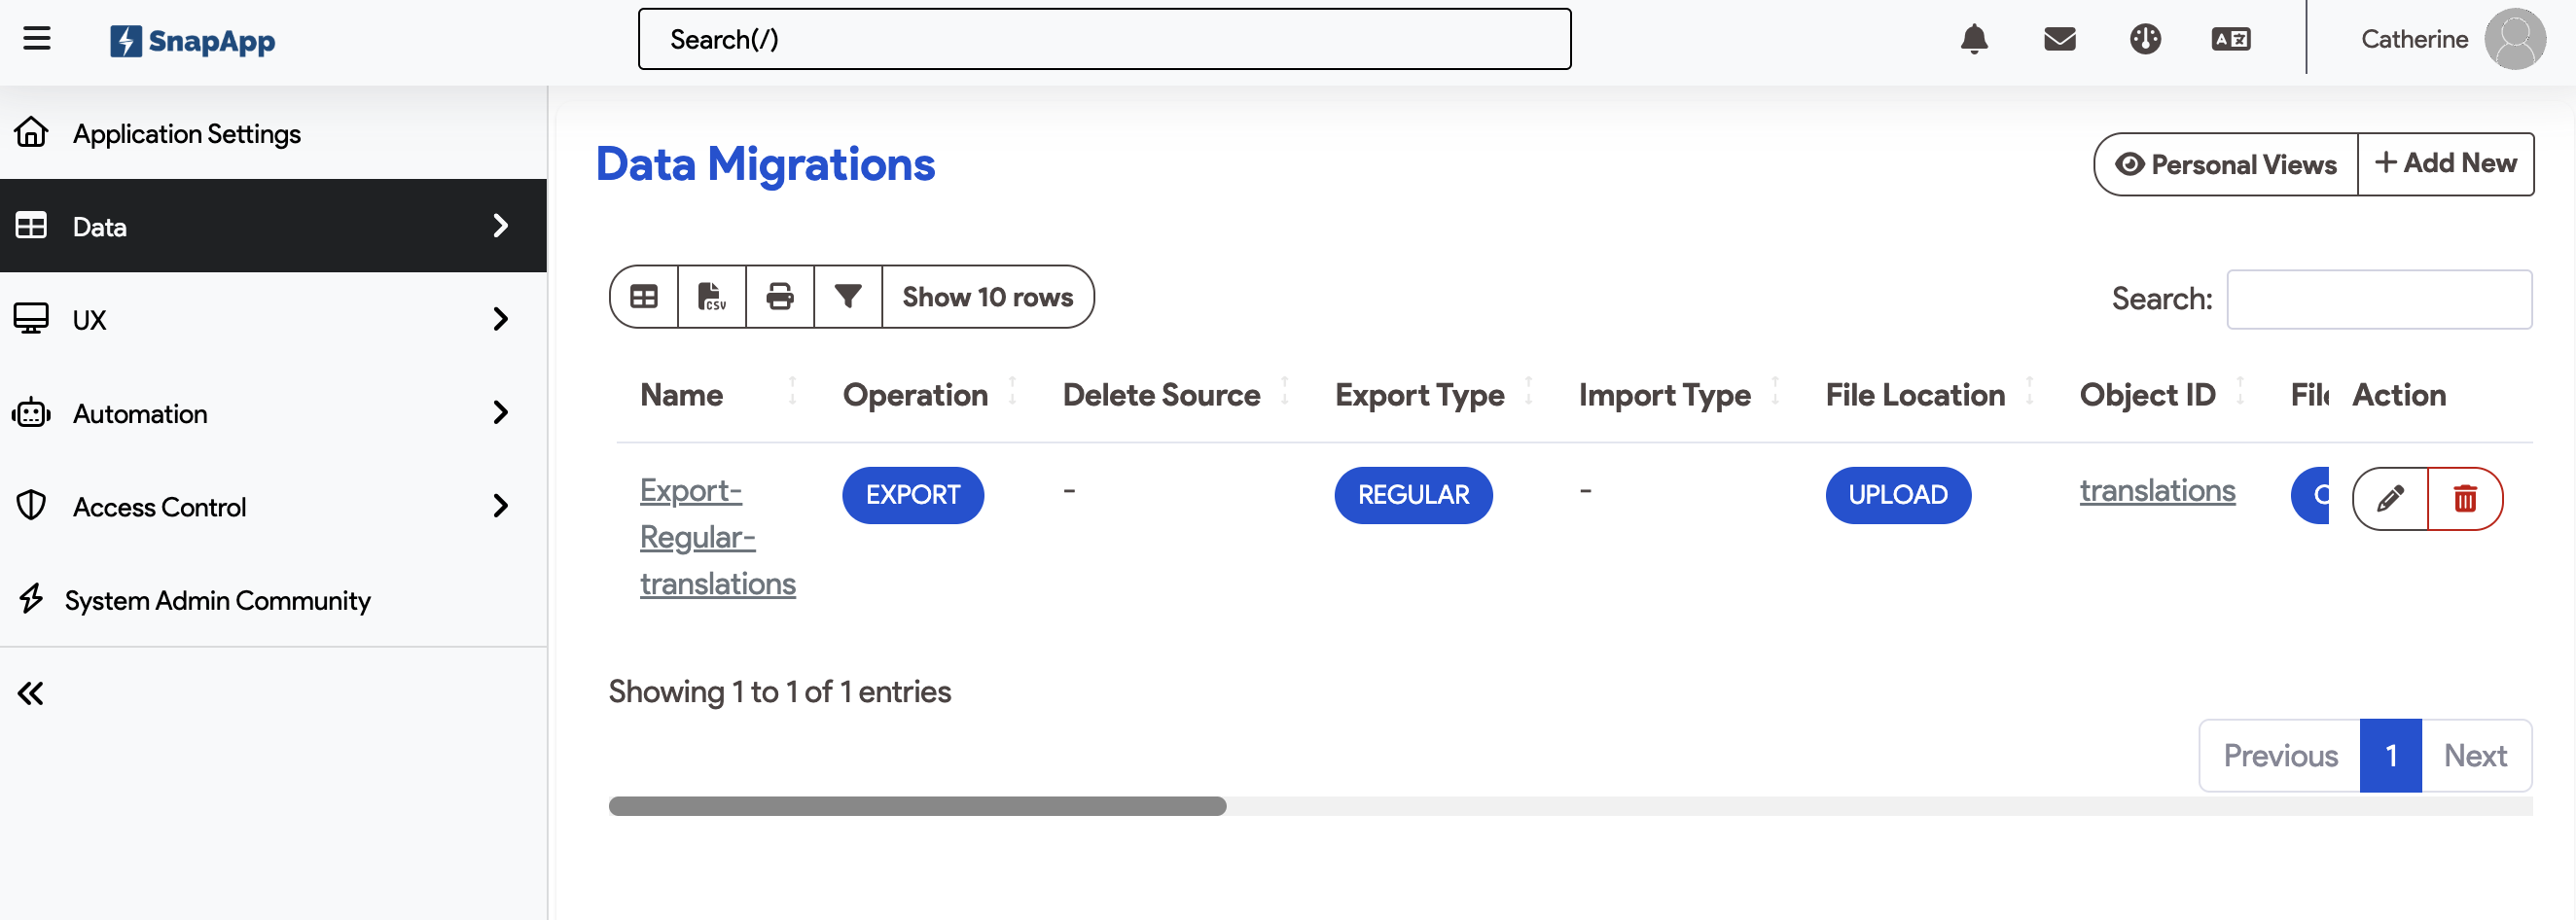
- Navigate to Data: Go to Settings > Data > Data Migrations.
- Select Import, Export, or Delete as the Migration type.
- Define the export file parameters by entering a query or selecting the object. Or, identify a delete file.
- Save: Once saved, this profile will appear in the dropdown menu of the Workflow Action configuration.
For more information on data migrations, see the data migrations documentation.
2. Configuration Guide
Once your data migration is created, navigate to Automation > Actions to add the Data Migration to your workflow.
Action Fields
- Data Migration (Dropdown): Select the pre-defined migration profile you created in the Data section.
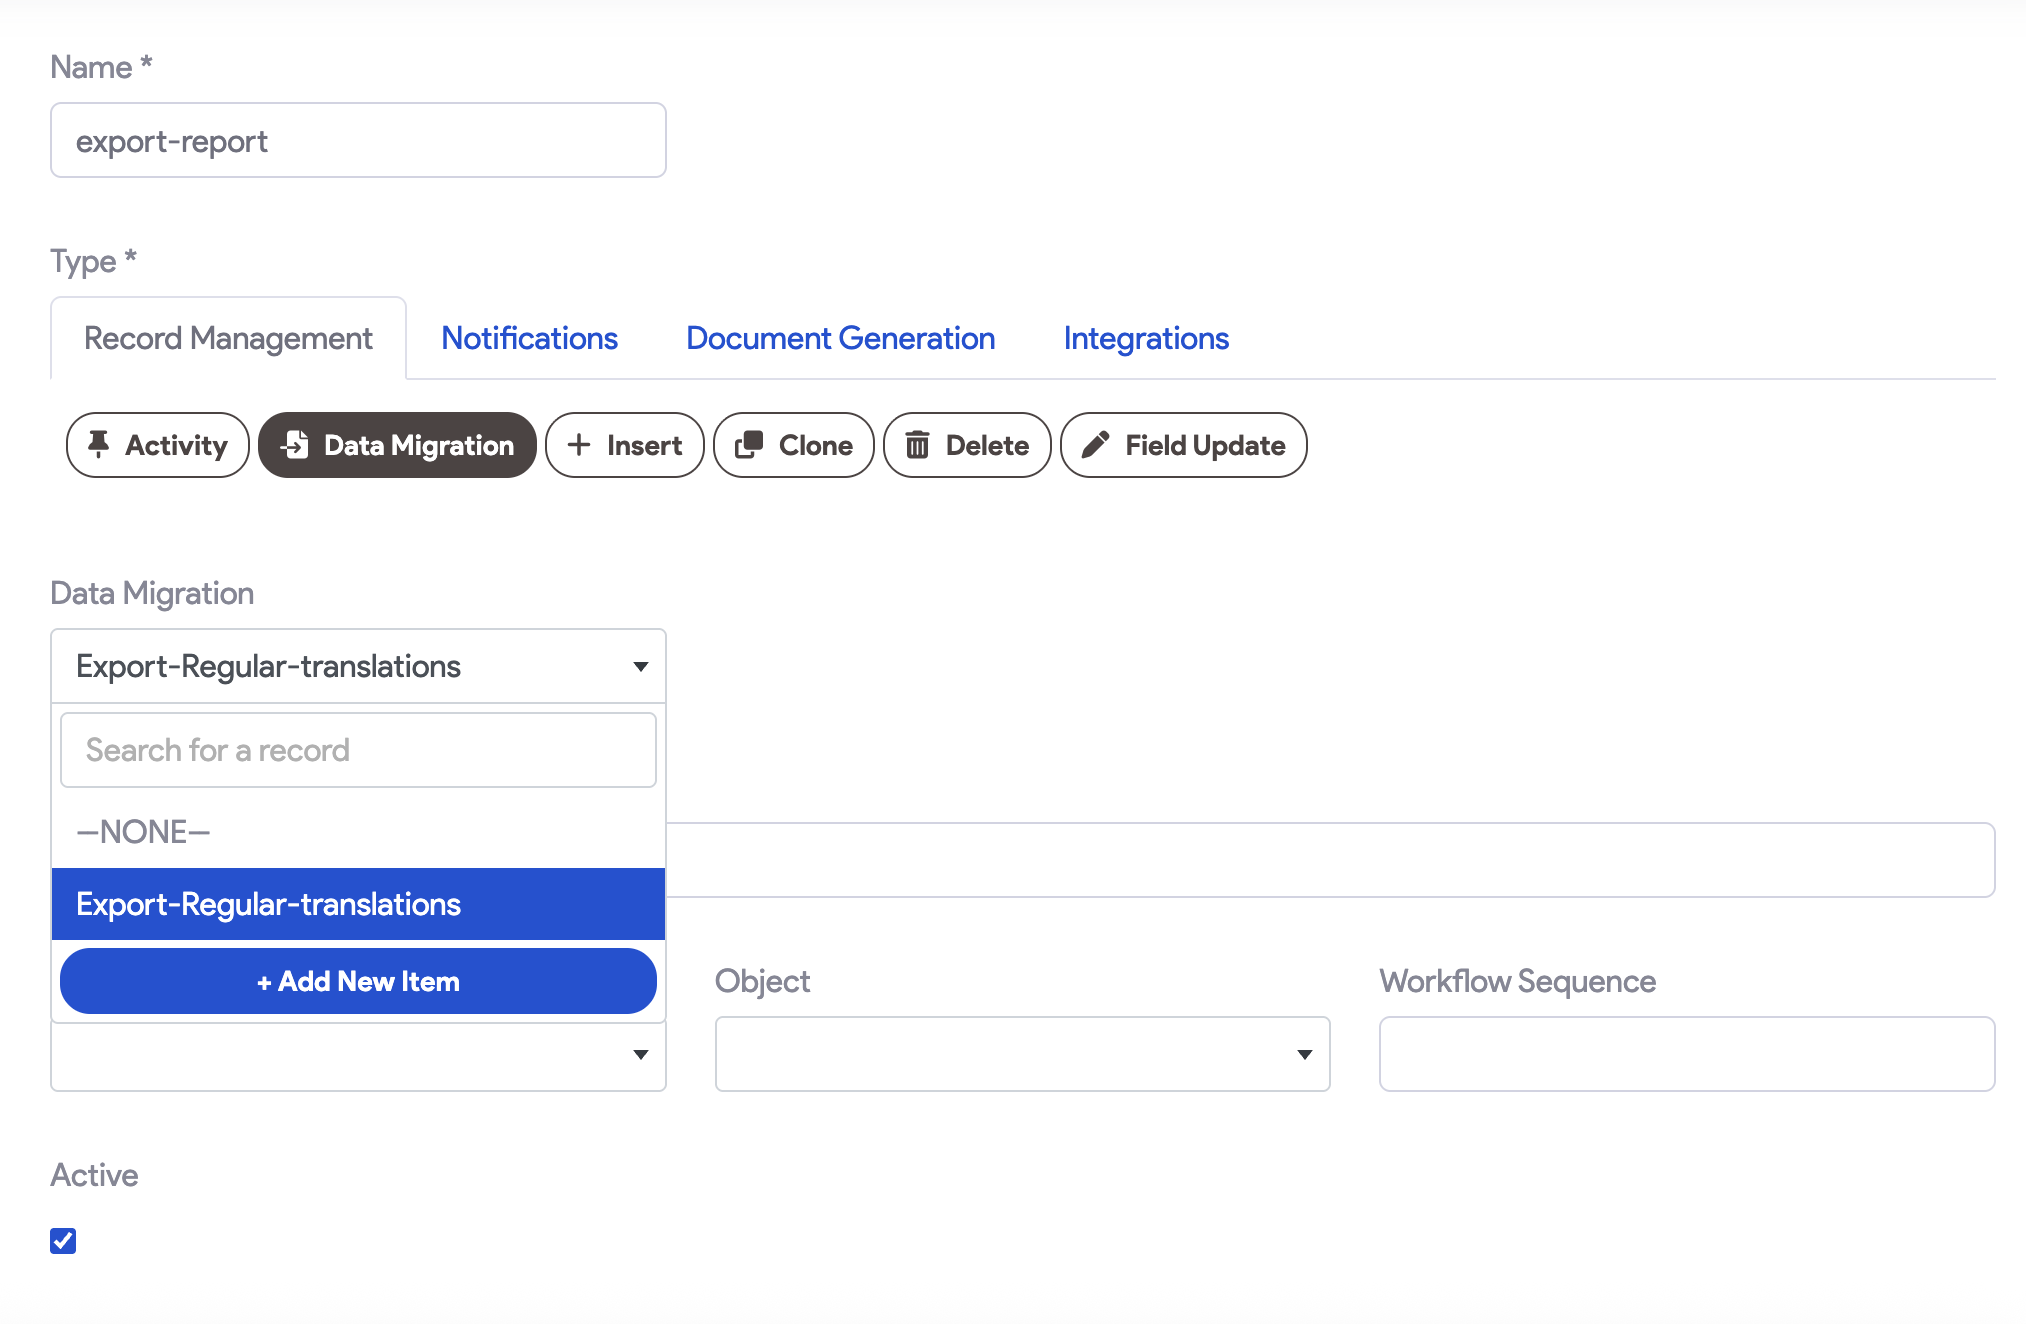
- Description: Enter a clear summary of this action’s purpose (e.g., “Monthly Export of Sales Data”).
- Workflow ID: Choose the parent workflow that will trigger this migration.
- Object: Select the primary SnapApp Object that this data migration will be performed on.
- Workflow Sequence: Enter a number to define the execution order. For example, set to
1if the migration must finish before a “Field Update” or “Notification” occurs at sequence2. - Active: Check this box to enable the action. If unchecked, the workflow will skip this step.
3. Automation & Triggers
The true power of the Data Migration Action lies in its ability to be triggered by different system events, removing the need for manual data handling:
| Trigger Type | Use Case |
|---|---|
| Time-Based | Automated Reporting: Run a migration on the 1st of every month to export data reports to specific users or external reporting tools. |
| Event-Based | Real-time Sync: Trigger a migration when a record is “Inserted” or “Updated” to keep external systems in sync instantly. |
| On-Demand | Manual Overrides: Allow administrators to trigger a migration via a button on a specific View. |
4. Why Use Data Migration Actions?
Monthly Data Exporting & Reporting
Automating monthly exports is a common requirement for enterprise applications. By using a Time-Based Trigger with a Migration Action, you can:
- Ensure Consistency: Automatically extract performance data and move it to a “Reporting Object” or external destination for stakeholders on a fixed schedule.
- Reduce Manual Work: Eliminate the need for team members to manually export CSVs and email them to users, reducing the risk of human error or missed deadlines.
Legacy System Integration
Use the migration action to keep your SnapApp environment updated with changes from legacy ERP or CRM systems. By configuring Delta Loads, the action will only migrate records that have changed since the last run, optimizing system performance.
Support
If you have any questions or need further assistance, please reach out to our support team.
Email: snapapp@bluevector.ai